Patio or Deck micro zone
The Surface, Rail, and Safety Zone
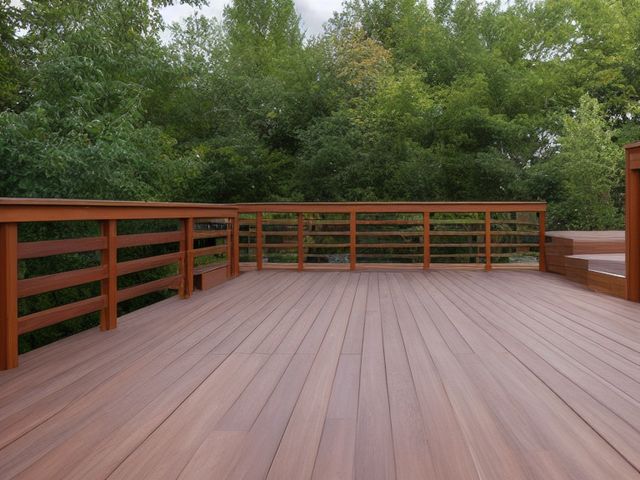
The railing and surface, in the Patio or Deck. The structure you stand on and lean against, kept sound and kept clear. Nothing on the deck that is not furniture, daylight visible through the gaps between boards, no green film on the shaded treads, and every rail post immovable when you push it hard.
One session: 45-75 min, most of it in Shine, because raking the board gaps is slow and it is also the inspection.
The short version
- Sort. This zone earns its state by having nothing stored in it
- Straighten. Walk the route from the door to the steps to the gate carrying a full
- Shine. Rake the gaps between boards clear with a putty knife or a paint stirrer
- Safety. Grab the top rail at every post and push hard, outward and then down
- Standardize. A dated tag inside the back door records when the rail was last pushed
- Sustain. Sweeping the deck is also the rail check, so push hard at two posts
Each step in full, with what to have on hand and what done looks like, below.
Where it is
Patio or Deck
6 micro zones, one session each
- 1The Outdoor Seating Zone
- 2The Grill and Outdoor Cooking Zone
- 3The Outdoor Dining Zone
- 4The Garden and Plant Care Zone
- 5The Outdoor Storage Zone
- 6The Surface, Rail, and Safety Zone
What done looks like
The structure you stand on and lean against, kept sound and kept clear.
- Nothing on the deck that is not furniture
- Daylight visible through the gaps between boards
- No green film on the shaded treads
- Every rail post immovable when you push it hard
What done looks like
Nothing on the deck that is not furniture, daylight visible through the gaps between boards, no green film on the shaded treads, and every rail post immovable when you push it hard.
Common items here
- A mat, square at the threshold
- Step lights, lit at every stair
- A dated tag, inside the back door
Check these before you start
- FallA railing post that moves when you push it will not hold an adult who stumbles into it, and the drop off the side of a deck is onto whatever is stored below. Algae film on the shaded boards and the stair treads turns to grease after rain, and the treads are where a slip costs the most.
- Fall, cut, or crushPopped fasteners and lifted splinters on a deck people cross barefoot in summer cut feet, and a raised screw head is also what catches a toe.
Which of these is true here?
Match what you are actually seeing in the railing and surface to why it keeps happening, then start at the pass that fixes that, not the top of the list.
A planter has drifted into the path between the door and the steps, a hose is coiled across the top step, or a bag of paving sand leans against a rail post
- None of it looks like it is blocking anything until you are actually carrying something with both arms and cannot see your feet. Confirm in 30 seconds: Ask someone who does not live here to name what looks out of place. If they see it instantly and you had stopped noticing, this is the cause. If that checks out, start at Sort.
- The hose and the sand bag do not have anywhere else assigned to live, so the top step is just where they landed after the last job. Confirm in 30 seconds: Ask where one specific item lives. If two people answer differently, or nobody answers, it has no home. If that checks out, start at Straighten.
- Whatever is leaning against the deck also holds damp against the wood underneath it, and that rot risk outranks the convenience of leaving it there. Confirm in 30 seconds: Look for the four: a blade your hand would meet, weight above shoulder height, heat beside something that burns, and an unsafe placement near a child's reach. If that checks out, start at Safety.
Nobody has pushed the top rail hard at every post recently, and a board you step over daily flexes slightly or feels soft underfoot without anyone testing it with a screwdriver
- A rail that gives under a stumble, or a board that is finished underneath, is a real fall-through risk, and that is worth the ten seconds it takes to check. Confirm in 30 seconds: Look for the four: a blade your hand would meet, weight above shoulder height, heat beside something that burns, and an unsafe placement near a child's reach. If that checks out, start at Safety.
- The check has no trigger attached to it, so it only happens if someone happens to think of it separately from any other job. Confirm in 30 seconds: Name the moment it happens. If the answer is "when I get round to it", there is no trigger and it will not survive a bad week. If that checks out, start at Sustain.
- Nobody in the house has actually been assigned as the one who does the seasonal push-and-probe, so it depends on whether anyone remembers. Confirm in 30 seconds: Ask who resets this zone. If the honest answer is "whoever gets to it" or two names with no agreement, there is no owner. If that checks out, start at Sustain.
Green algae film has built up on the shaded boards and the stair treads, or the gaps between boards are packed with debris instead of clear
- Getting into every gap with a putty knife and scrubbing the shaded boards is real work compared to the rest of a sweep, so it is the part that gets skipped. Confirm in 30 seconds: Time how long it actually takes to reach and wipe the surface. If it requires moving something first, that cost is why it is skipped. If that checks out, start at Shine.
- The film only shows up as a slightly duller color in a corner that is already shaded, so it does not read as the slip hazard it actually is until it rains. Confirm in 30 seconds: Ask someone who does not live here to name what looks out of place. If they see it instantly and you had stopped noticing, this is the cause. If that checks out, start at Sort.
- A blocked gap holding water against a board end is invisible unless you are down at board level looking for it, not just walking across the top. Confirm in 30 seconds: Open the door and, without moving anything, name what is at the back. If you cannot, that stock is invisible. If that checks out, start at Straighten.
Only have 15 minutes? Walk the full route from the door to the steps to the gate carrying a full laundry basket in both arms, and pull off the route anything you have to step around. Victory: The full route from the door to the steps to the gate is clear enough to walk carrying a full laundry basket without stepping around anything.
The six passes, in order
Work them in this order. Sorting after you have arranged things means arranging things you were about to remove.
This zone's full kit list is below, after the method. Skim it first if you would rather gather everything before you start.
Sort
Decide what stays. Everything else leaves the zone now.
This zone earns its state by having nothing stored in it. The planter that has drifted into the walking route, the hose coiled across the top step, and the bag of paving sand leaning on a rail post all come off the deck entirely, because each of them holds damp against the wood it sits on as well as standing in your way.
What to store it in, now that you know what you are keeping
Bins and shelves are for what Sort left behind, not a stand-in for it. Buying storage before sorting means buying a container for things you have not yet decided to keep.
Only if it applies to the railing and surface: 6 more
Not every home needs these for the railing and surface. Each one is here because some do, and the reason is next to it.
- Grill Tool Rack Create safe homes for outdoor cooking tools, in the Straighten, Standardize and Sustain passes. Do not overload; anchor wall-mounted or tall systems where required.
- Sports Ball Bin Contain loose balls and gear, in the Straighten, Standardize and Sustain passes. Do not overload; anchor wall-mounted or tall systems where required.
- Deck Box Protect outdoor cushions and patio items, in the Straighten, Standardize and Sustain passes. Do not overload; anchor wall-mounted or tall systems where required.
- Garden Tool Caddy Contain small garden tools and supplies, in the Straighten, Standardize and Sustain passes. Do not overload; anchor wall-mounted or tall systems where required.
- Large Clear Latching Bin ×2 Contain seasonal, garage, and bulk items, in the Straighten, Standardize and Sustain passes. Do not overload; anchor wall-mounted or tall systems where required.
- Hose Reel Control garden hose and protect walkways, in the Straighten, Standardize and Sustain passes. Do not overload; anchor wall-mounted or tall systems where required.
Straighten
Give what stays a home, placed where the hand actually reaches.
Walk the route from the door to the steps to the gate carrying a full laundry basket in both arms so you cannot see your feet. Whatever you have to step around gets moved. The mat sits square at the threshold with its edges lying flat, not curling up at a corner.
Shine
Clean it, and use the cleaning to inspect what you cannot see when it is full.
Rake the gaps between boards clear with a putty knife or a paint stirrer, because a blocked gap holds water against the board ends and that is precisely where rot begins. Then scrub the green algae film off the shaded boards and the stair treads, which is the slipperiest surface anywhere on the property after rain.
Surface by surface, all 9 of them, with what to use on each.
Safety
Make the zone safe for everybody who uses it, including the shortest person.
Grab the top rail at every post and push hard, outward and then down. Any movement, any softness under your thumb, any screw head standing proud is a stop and fix today. Check that every stair tread rises the same height as the ones above and below it, and that the step lights still come on, because one odd riser in the dark is how people go down. Find it, and fix it now.
Standardize
Write down the best way you know today, so it survives you forgetting.
A dated tag inside the back door records when the rail was last pushed and the boards last probed, so the next check starts from a written date rather than an argument about whether you did it in spring.
Sustain
Attach the reset to something that already happens, so it keeps itself.
Sweeping the deck is also the rail check, so push hard at two posts before the broom goes away. Ten seconds, and the whole rail gets tested across a season without a job ever being booked. Slip is a post that gives under your hand, or a green film on the shaded treads, which is the surface telling you it is staying wet. Recovery is the dated tag inside the back door, so the next check starts from a date rather than an argument. Everything that fails out here fails slowly and from underneath.
The kit this zone called for
Everything above assumed you had these already. Types of thing, not brands: anything you already own that does the job is the right one to use.
- Long-handled deck scrub brush Shine Stiff enough for algae film, soft enough not to raise the grain on softwood. Work with the grain of the boards..
- Garden hose Shine Drain and disconnect before the first frost. Never run a hose across the walking route between the door and the steps..
- Stiff scrubbing brush Shine Work outdoors where the run-off goes to ground rather than into a household drain.
- Push broom Shine, Sustain Hang head-up on a rail; bristles resting on concrete splay and re-soil the floor they touch.
- Color-coded microfiber cloth set ×12 Shine Wash by use color; avoid fabric softener.
- Neutral pH multi-surface cleaner Shine, Sustain Verify surface compatibility; lock around children and pets.
- Compact vacuum with attachments Shine Use appropriate attachment.
- Keep, Relocate, Donate, Recycle, Trash container set ×5 Sort Do not block exits.
- Portable cleaning caddy Straighten, Shine, Sustain Secure chemicals from children and pets.
- Portable label maker Standardize, Sustain Follow surface and adhesive guidance.
- Removable write-on labels Standardize Test on delicate finishes.
Only if it applies to the railing and surface: 2 more
- Floor-material-compatible cleaner Shine, Sustain Match cleaner to floor material.
- Moisture Absorber or Humidity Monitor Safety, Sustain Install and use according to product instructions.
The board that gives
There is a board you step over without thinking, or one that flexes slightly under your weight, and you have quietly filed it as fine. Test it properly instead. Push a screwdriver into the board where it crosses a joist, and again into the board end nearest the house. If the tip sinks in with light pressure, that board is finished and replacing one board is a morning's work. The harder judgment is what a soft board is telling you. If two boards side by side are soft, or if the softness is at the ledger where the deck meets the wall of the house, then the framing underneath has the problem and the surface is only the symptom. The rule that settles it: soft in one spot on top, replace the board yourself; soft in two adjacent places or soft at the wall, stop putting people on it and get someone underneath it with a torch before the next time you have guests standing out here together.
Cleaning it properly, surface by surface
This is the surface you trust with your whole weight, so cleaning it is how you read it. Rake the gaps clear, scrub the algae off the shaded treads, and let the deck tell you where water has been sitting.
Work down, not across. Whatever comes off a high surface lands on the one below it, so cleaning the floor first means cleaning it twice.
Carry these in with you. Neutral pH multi-surface cleaner; Floor-material-compatible cleaner; Color-coded microfiber cloth set; Portable cleaning caddy; Long-handled deck brush; Putty knife or paint stirrer; Garden hose; Broom.
- The deck board surface
Sweep the whole deck first, then scrub the boards with a deck brush and the neutral pH cleaner, working with the grain, and rinse the loosened dirt off toward the edge. - The gaps between the boards
Rake each gap clear with a putty knife or a paint stirrer until you can see daylight through it, because a packed gap holds water against the board ends and that is where rot begins. - The board ends and the house-side junction
Brush the debris out of the line where the boards meet the house wall or the ledger, the trap that collects the most leaf litter and stays wettest. - The stair treads and risers
Scrub the green algae film off the treads with a stiff brush, since that shaded film is the slipperiest surface on the property after rain, then wipe down the risers and the stringers beside them. - The top rail and the balusters
Wash the top rail where hands leave grime, then go down the balusters and into the gaps between the spindles where dirt and cobwebs gather out of sight. - The rail posts and their bases
Brush the grit out of the joint where each post meets the deck and wipe the base plate, clearing the spot where standing debris keeps the fixing wet. - The step lights and lenses
Wipe each step-light lens with a barely damp cloth and dry it right away, so no water sits in the fixture and the light still reaches the tread it is meant to show. - The area under the deck
Sweep out whatever has drifted or been stored beneath the deck so the space stays clear and the underside of the boards can breathe and dry. - The gutter above this space and its downpipe outlet
Feet on a stable ladder set on firm ground with somebody who knows you are up it, and if the gutter is above single-story height, this is a job to pay for rather than to attempt. Scoop the debris out by hand into a bucket hooked to the ladder rather than dropping it, working away from the downpipe so you are never pushing the blockage into it. Flush with a hose and watch the outlet: water that backs up means the downpipe itself is blocked. Check while you are there that the brackets are tight and the fall still runs towards the outlet, because a sagging gutter empties down a wall instead.
How to clean anything else in the house, surface by surface.
Inspect as you clean. Cleaning is the only time you see the zone empty, so use it.
- A board end or a blocked gap that stays dark and spongy under the brush is rot setting in. Press it and flag any board that gives.
- Rust bleeding out of a fastener and staining the board around it means the screw or nail is corroding below the surface.
- A proud screw head or a lifted splinter that catches the brush is a bare foot waiting to happen. Note exactly where it sits.
- A tread that flexes underfoot as you scrub, or a stringer gone soft at the bottom, is a stair losing its footing.
- A step light gone dead or fogged behind its lens, and algae that regrows fast in one spot, both point to water pooling where it should drain.
The standard that keeps it fixed
Nothing stored on the walking route, gaps clear, and a dated tag recording the last rail push and board probe.
Reset trigger. Every time you sweep, push the rail at two posts before you put the broom away.
How much the railing and surface can actually hold
Nothing on the deck that is not furniture, daylight visible through the gaps between the boards, no green film on the shaded treads, and every rail post immovable when you push it hard.
There is no number to exceed here, only a check to fail. A rail post that moves is a repair rather than a tidying job, and it comes before anything else on this page. Run the honest count.
When this does not describe your railing and surface
The passes above describe the ordinary case. Plenty of real households are not ordinary, and the fix is not to skip the method, it is to run it against a different starting shape.
- A raised deck or a balcony above ground level
- The rail check becomes the most important thing you do out here, and it is seasonal rather than annual. Check the fixings into the structure rather than the rail itself, because a rail usually feels sound right up until the post does not.
- A ground-level patio of slabs or concrete
- The rail rules fall away and the surface ones tighten. Lifted or rocking slabs and green film in the shade are the hazards here, and both are easy to walk past for a year because neither looks like damage.
The rest of the patio or deck
Each of these is one session on its own.
- The Outdoor Seating Zone
- The Grill and Outdoor Cooking Zone
- The Outdoor Dining Zone
- The Garden and Plant Care Zone
- The Outdoor Storage Zone
- The Surface, Rail, and Safety Zone, you are here
The Patio or Deck in full, with what each of the 6 zones is for
The patio or deck as a deck of 68 cards: the frictions people report in each zone, the root cause behind each one, and the timed action that clears it. Free to read or print.
Zones that do the same job, elsewhere in the house
Different room, different name, same real job. Each one is its own page because the room around it changes what actually works.
- The Floor and Circulation Path in the living room
- The Door, Mat, and Immediate Floor in the entryway
- The Stair and Floor Path in the stair landing
Related reading
- Is one spot in this zone always the one you skip?
- Have you stopped noticing the clutter in this zone?
- Why the standard above names one home per category
- Does more than one person use this zone?
- Found a duplicate of something in this zone?
Questions people ask about this zone
- How long does it take to reset the railing and surface?
- One session: 45-75 min, most of it in Shine, because raking the board gaps is slow and it is also the inspection.
- What does a finished railing and surface look like?
- Nothing on the deck that is not furniture, daylight visible through the gaps between boards, no green film on the shaded treads, and every rail post immovable when you push it hard.
- What is the hardest call to make in the railing and surface?
- There is a board you step over without thinking, or one that flexes slightly under your weight, and you have quietly filed it as fine. Test it properly instead. Push a screwdriver into the board where it crosses a joist, and again into the board end nearest the house. If the tip sinks in with light pressure, that board is finished and replacing one board is a morning's work. The harder judgment is what a soft board is telling you. If two boards side by side are soft, or if the softness is at the ledger where the deck meets the wall of the house, then the framing underneath has the problem and the surface is only the symptom. The rule that settles it: soft in one spot on top, replace the board yourself; soft in two adjacent places or soft at the wall, stop putting people on it and get someone underneath it with a torch before the next time you have guests standing out here together.
- How do you keep the railing and surface from getting cluttered again?
- Nothing stored on the walking route, gaps clear, and a dated tag recording the last rail push and board probe. Every time you sweep, push the rail at two posts before you put the broom away.
- What do you need to clean the railing and surface?
- Neutral pH multi-surface cleaner; Floor-material-compatible cleaner; Color-coded microfiber cloth set; Portable cleaning caddy; Long-handled deck brush; Putty knife or paint stirrer; Garden hose; Broom.
- What do you clean first in the railing and surface?
- The deck board surface. Sweep the whole deck first, then scrub the boards with a deck brush and the neutral pH cleaner, working with the grain, and rinse the loosened dirt off toward the edge.
- Is there a fall risk in the railing and surface?
- A railing post that moves when you push it will not hold an adult who stumbles into it, and the drop off the side of a deck is onto whatever is stored below. Algae film on the shaded boards and the stair treads turns to grease after rain, and the treads are where a slip costs the most.
- Is there a fall, cut, or crush risk in the railing and surface?
- Popped fasteners and lifted splinters on a deck people cross barefoot in summer cut feet, and a raised screw head is also what catches a toe.
- Why does the railing and surface do this: A planter has drifted into the path between the door and the steps, a hose is coiled across the top step, or a bag of paving sand leans against a rail post?
- None of it looks like it is blocking anything until you are actually carrying something with both arms and cannot see your feet, so start at Sort; The hose and the sand bag do not have anywhere else assigned to live, so the top step is just where they landed after the last job, so start at Straighten; Whatever is leaning against the deck also holds damp against the wood underneath it, and that rot risk outranks the convenience of leaving it there, so start at Safety.
- Why does the railing and surface do this: Nobody has pushed the top rail hard at every post recently, and a board you step over daily flexes slightly or feels soft underfoot without anyone testing it with a screwdriver?
- A rail that gives under a stumble, or a board that is finished underneath, is a real fall-through risk, and that is worth the ten seconds it takes to check, so start at Safety; The check has no trigger attached to it, so it only happens if someone happens to think of it separately from any other job, so start at Sustain; Nobody in the house has actually been assigned as the one who does the seasonal push-and-probe, so it depends on whether anyone remembers, so start at Sustain.
- Why does the railing and surface do this: Green algae film has built up on the shaded boards and the stair treads, or the gaps between boards are packed with debris instead of clear?
- Getting into every gap with a putty knife and scrubbing the shaded boards is real work compared to the rest of a sweep, so it is the part that gets skipped, so start at Shine; The film only shows up as a slightly duller color in a corner that is already shaded, so it does not read as the slip hazard it actually is until it rains, so start at Sort; A blocked gap holding water against a board end is invisible unless you are down at board level looking for it, not just walking across the top, so start at Straighten.
When you want it off the screen
Carry The Surface, Rail, and Safety Zone into the room
The method above is complete and free. The Whole House Print Pack puts The Surface, Rail, and Safety Zone and the other 113 micro zones on 684 printable cards, so the steps you just read are not stuck behind a phone screen while your hands are full.
The Print Pack, 19 dollarsJust this zone, 4 dollarsOr draw a card free
The Surface, Rail, and Safety Zone on its own is 4 dollars for 6 cards. All 114 micro zones is 19 dollars for 684. The whole house is the better buy; the single zone is here so you can take only what you are working on.
If The Surface, Rail, and Safety Zone keeps fighting back, the real problem usually sits somewhere else in the room. A one hour virtual consult is 250 dollars: we find the function, the friction and the root cause together, and you keep a written standard for the space.
See what a consult covers, 250 dollars
Not ready to pay for that either? Ask which zone first, free