Stair Landing micro zone
The Stair and Floor Path
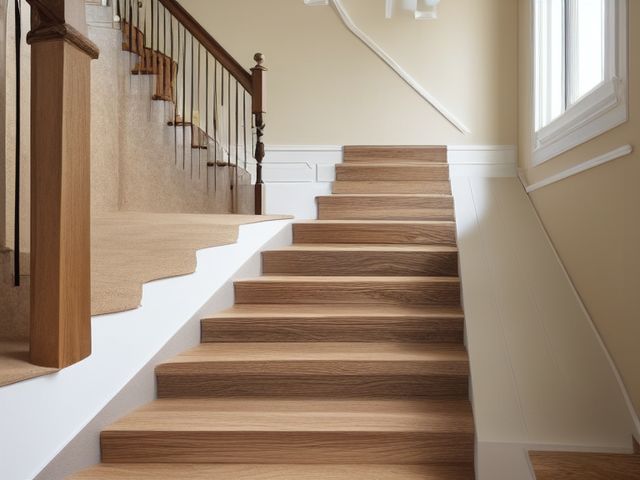
The steps, in the Stair Landing. The treads, runner, handrail and lighting that carry every person in the house between floors, several times a day, often with their arms full. Every tread bare from nose to riser, including the bottom three steps that usually stage things. The runner lies flat with no lifted corner at the turn. The handrail runs unbroken and unobstructed from the top newel post to the bottom, with no bag, coat or dog lead hung on either post. Both switches work, so the top step and the bottom step are lit before you take them.
One session: 30-45 min, most of it in Safety, walking the flight tread by tread and fixing what you find.
The short version
- Sort. Nothing lives on stairs, clear the folded laundry, the shoes, the box
- Straighten. The one thing that must stay reachable here is the handrail
- Shine. Vacuum the tread noses, the crevice where each tread meets its riser
- Safety. Walk the flight slowly and test as you go: press each tread nose for movement
- Standardize. The standard is one sentence anyone in the house can check: bare treads, full width
- Sustain. The last person up at night takes the flight
Each step in full, with what to have on hand and what done looks like, below.
Where it is
Stair Landing
3 micro zones, one session each
- 1The Landing Surface or Console
- 2The Wall and Display Zone
- 3The Stair and Floor Path
What done looks like
The treads, runner, handrail and lighting that carry every person in the house between floors, several times a day, often with their arms full.
- Every tread bare from nose to riser, including the bottom three steps that usually stage things
- The runner lies flat with no lifted corner at the turn
- The handrail runs unbroken and unobstructed from the top newel post to the bottom, with no bag, coat or dog lead hung on either post
- Both switches work, so the top step and the bottom step are lit before you take them
What done looks like
Every tread bare from nose to riser, including the bottom three steps that usually stage things. The runner lies flat with no lifted corner at the turn. The handrail runs unbroken and unobstructed from the top newel post to the bottom, with no bag, coat or dog lead hung on either post. Both switches work, so the top step and the bottom step are lit before you take them.
Common items here
- A stair runner
- Working step lighting
- An unobstructed handrail
What belongs, and what strays in
Belongs here:
- A stair runner lying flat, no lifted corner
- An unbroken, unobstructed handrail
- Working step lighting, top and bottom
Strays in and should leave:
- Folded laundry staged on a tread
- Shoes left on a step
- A box left sitting on a tread since the weekend
Check these before you start
- FallA lifted runner corner, a loose handrail bracket, or a dead bulb over the top step. Each one is a fall on the hardest surface in the house, and they tend to arrive together, at night.
- Fall, cut, or crushCarrying a laundry basket or a box you cannot see over means going down blind with no free hand for the rail. Anything parked on the bottom three steps is invisible to that person.
- Water and electricityChanging the bulb over the stairwell means standing high on a flight with a live fitting overhead. Switch the light off at the wall, let a hot bulb cool, and work from the landing on a properly footed ladder rather than balancing on a tread.
Which of these is true here?
Match what you are actually seeing in the steps to why it keeps happening, then start at the pass that fixes that, not the top of the list.
A lifted runner corner or a loose rod gets pressed back into place and left instead of actually refixed
- Fixing it properly means clearing the whole flight and buying rods or tape, and that's a bigger job than the few minutes I have when I notice it. Confirm in 30 seconds: Pick up one piece. If your first thought is a verb (pay, sign, call, decide) rather than a place, it needs a decision, not a home. If that checks out, start at Sort.
- Nothing prompts a proper refix, so pressing it down becomes the whole routine. Confirm in 30 seconds: Name the moment it happens. If the answer is "when I get round to it", there is no trigger and it will not survive a bad week. If that checks out, start at Sustain.
- I've stopped seeing the lifted corner as a real hazard because it's been like that for a while. Confirm in 30 seconds: Ask someone who does not live here to name what looks out of place. If they see it instantly and you had stopped noticing, this is the cause. If that checks out, start at Sort.
A bulb lighting the top or bottom step burns out and nobody replaces it until someone nearly misses a step in the dark
- There's no spare bulb kept on hand for this fitting, so a burnout turns into a multi-day wait. Confirm in 30 seconds: Find the last one of something you use daily. If nothing tells you it is the last one, you will find out at the worst possible moment. If that checks out, start at Standardize.
- Nobody checks the stairwell lighting on a schedule, it only gets noticed at night by accident. Confirm in 30 seconds: Name the moment it happens. If the answer is "when I get round to it", there is no trigger and it will not survive a bad week. If that checks out, start at Sustain.
- Nobody in the house is the one who's supposed to notice or replace it. Confirm in 30 seconds: Ask who resets this zone. If the honest answer is "whoever gets to it" or two names with no agreement, there is no owner. If that checks out, start at Sustain.
Laundry, shoes or a delivery box gets set down on the bottom three steps instead of carried the rest of the way
- The thing on the step has no assigned home on the floor it's actually headed to. Confirm in 30 seconds: Ask where one specific item lives. If two people answer differently, or nobody answers, it has no home. If that checks out, start at Straighten.
- There's no agreed rule that stairs are never used as a shelf. Confirm in 30 seconds: Ask two people in the house to describe this zone when it is finished. Two different answers means there is no standard to keep. If that checks out, start at Standardize.
- Carrying it needs a free hand, and the hand that should be on the rail is already full, so it gets set down instead. Confirm in 30 seconds: Have the shortest person who uses this zone fetch what they need daily. If they climb, reach overhead, or ask for help, the height is wrong. If that checks out, start at Safety.
Only have 15 minutes? Clear every tread of anything sitting on it, laundry, shoes, a box, in one trip to where it actually belongs, then stand at the bottom of the flight and check that both the top and bottom lights actually come on. Victory: Every tread is bare from nose to riser, and both the top and bottom stair lights work.
The six passes, in order
Work them in this order. Sorting after you have arranged things means arranging things you were about to remove.
This zone's full kit list is below, after the method. Skim it first if you would rather gather everything before you start.
Sort
Decide what stays. Everything else leaves the zone now.
Nothing lives on stairs. Clear the folded laundry, the shoes, the box that has sat on step four since the weekend, all of it in one trip, and put each thing where it belongs on its own floor rather than restaging it on the landing above.
Straighten
Give what stays a home, placed where the hand actually reaches.
The one thing that must stay reachable here is the handrail, so strip both newel posts of coats, bags and leads. If a stair gate is fitted, set the top gate to swing away from the flight and never out over it.
Shine
Clean it, and use the cleaning to inspect what you cannot see when it is full.
Vacuum the tread noses, the crevice where each tread meets its riser, and along the stringer where a runner is tucked. That trapped grit is what polishes a runner slick under a stocking foot. Wipe the handrail its full length, including the underside your fingers wrap around.
Surface by surface, all 9 of them, with what to use on each.
Safety
Make the zone safe for everybody who uses it, including the shortest person.
Walk the flight slowly and test as you go: press each tread nose for movement, tug each runner edge, and grip the rail hard at top, middle and bottom to find a loose bracket. Then stand at the bottom in the dark and look at the top step, and stand at the top and look at the bottom. A burnt-out bulb over a top step is the single most dangerous thing in this room. Find it, and fix it now.
Standardize
Write down the best way you know today, so it survives you forgetting.
The standard is one sentence anyone in the house can check: bare treads, full width, lit at both ends, rail clear. Photograph the empty flight from the bottom and put that picture where the staging happens, which is almost always beside the bottom step.
Sustain
Attach the reset to something that already happens, so it keeps itself.
The last person up at night takes the flight with one hand on the rail and carries whatever is sitting on a tread. If their hands are too full to hold the rail, that is the signal to make two trips, and two trips is the right answer rather than a failure. Slip is anything on a step, or a runner corner lifted at the turn, both visible from the bottom. Recovery is clearing the treads now. The bottom three steps are the most natural staging shelf in the house.
The kit this zone called for
Everything above assumed you had these already. Types of thing, not brands: anything you already own that does the job is the right one to use.
- Color-coded microfiber cloth set ×12 Shine Wash by use color; avoid fabric softener.
- Neutral pH multi-surface cleaner Shine, Sustain Verify surface compatibility; lock around children and pets.
- Compact vacuum with attachments Shine Use appropriate attachment.
- Keep, Relocate, Donate, Recycle, Trash container set ×5 Sort Do not block exits.
- Portable cleaning caddy Straighten, Shine, Sustain Secure chemicals from children and pets.
- Portable label maker Standardize, Sustain Follow surface and adhesive guidance.
- Removable write-on labels Standardize Test on delicate finishes.
Only if it applies to the steps: 4 more
- Floor-material-compatible cleaner Shine, Sustain Match cleaner to floor material.
- Stable household step stool Safety Use on level surfaces only.
- Anti-tip anchors and hardware Safety Install to manufacturer and wall-type requirements.
- Water-resistant permanent labels Standardize, Sustain Avoid irreplaceable surfaces.
The runner that has already lifted once
If your stairs have a runner and one corner has lifted or one rod has worked loose, you have almost certainly pressed it back down and carried on. That is the decision you keep deferring, and it is the wrong shape, because a runner that has lifted once has already told you what it will do again. Choose today between two honest options and refuse the third. Either refix it properly along its whole length, with rods or full-width tape on every tread rather than a patch on the one failed corner, or take it up entirely and live with bare treads. Bare wood you know is slippery beats a runner you have quietly stopped trusting, because you adjust your step for the first and not the second. The one thing you may not do is press it down again and wait.
Cleaning it properly, surface by surface
Top to bottom and rail first: handrail, posts and balusters, then the treads, the risers, the runner and its tucked edges, and the landing floor last. The step almost everyone skips is the crevice where each tread meets its riser, and that grit is what turns a runner slick.
Work down, not across. Whatever comes off a high surface lands on the one below it, so cleaning the floor first means cleaning it twice.
Carry these in with you. Compact vacuum with attachments; Color-coded microfiber cloth set; Floor-material-compatible cleaner; Neutral pH multi-surface cleaner; Portable cleaning caddy.
- The handrail, full length including the underside
Start with the rail. Wipe it the whole length from the top newel to the bottom, and do not skip the underside your fingers wrap around, which carries the oil off every hand that has ever used it. - Both newel posts
Wipe the top and bottom newel posts, including the flat cap on top where dust settles and set-down keys leave a film. - The balusters or spindles
Run a cloth or the vacuum's brush down each baluster, catching the dust that clings to the inside faces you never see head on. - The tread noses, the tread-to-riser crevice, and the riser faces
Vacuum along every tread nose and right into the crevice where each tread meets its riser, since that trapped grit is exactly what polishes a runner slick under a stocking foot. Then wipe the riser faces below with a barely damp cloth, where toe scuffs and shoe marks collect the way nothing on the flat does. - The runner and its edges tucked at the stringer
Vacuum the runner down the middle, then along both edges where it tucks against the stringer. Spot clean any mark with a cloth only barely damp, so the backing never soaks through. - The bare tread either side of the runner
Wipe the bare wood or painted strip on each side of the runner with a cleaner matched to the material, drying as you go so no tread is left damp underfoot. - The bottom three steps
Clear and clean the bottom three steps that usually end up staging things headed upstairs, so they read as stairs and not as shelves. - The landing floor, the switches, and the light fittings
Finish on the flat. Vacuum and mop the landing floor, and wipe both light switches and the plate around them where every hand pushes, keeping the cloth just damp and off the switch itself. - The smoke alarm and the carbon monoxide alarm on this landing
Dust before you test, because dust in the chamber is the single commonest cause of a false alarm at three in the morning. Take the compact vacuum's brush attachment gently over the vents and the case, all the way round, without pressing anything into the slots. Then press and HOLD the test button until it sounds: a short beep is not a test. If it chirps intermittently at any other time, that is the battery or, on a sealed ten-year unit, the unit telling you it has reached the end of its life. Write the replace-by date on the case with a removable write-on label so the next person does not have to guess.
How to clean anything else in the house, surface by surface.
Inspect as you clean. Cleaning is the only time you see the zone empty, so use it.
- As you vacuum each tread nose, notice any tread that gives or flexes underfoot, and flag it.
- Note any runner corner that has lifted as you clean the edges, and any worn strip on a nose where the pile has gone thin.
- While you wipe the rail's length, notice any bracket that has worked loose or any section that turns slightly in its fixing under the cloth.
- While you clean the treads under each fitting, flag a bulb over the top or bottom step that is dim, flickering, or dead, because that is the most dangerous fault this room can hold.
- Watch the stringer and skirting for a cracked or springy board, and the switch plates for warmth or discoloring as you wipe them.
The standard that keeps it fixed
Bare treads at full width, runner flat and fixed the whole way, handrail clear from newel to newel, and working light at both ends.
Reset trigger. When you head up to bed, you go with a hand on the rail and nothing left standing on a tread behind you.
How much the steps can actually hold
Every tread bare from nose to riser including the bottom three, the runner lying flat with no lifted corner at the turn, and the handrail unbroken and unobstructed from the top newel post to the bottom.
There is no quantity here and no honest version that does not fit, because the capacity of a stair tread is nothing. A step used to stage things for upstairs is the most reliably dangerous surface in a house. Run the honest count.
When this does not describe your steps
The passes above describe the ordinary case. Plenty of real households are not ordinary, and the fix is not to skip the method, it is to run it against a different starting shape.
- A household that genuinely uses the stairs to stage things
- Replace the habit rather than banning it. One basket at the top and one at the bottom, off the treads and out of the walking line, emptied on the next trip. The staging need is real; the treads are simply the wrong place to meet it.
- Small children, or anyone unsteady on stairs
- The handrail becomes the whole zone: continuous, firmly fixed and graspable the entire way, including around the turn. Add light at both ends switchable from either, and check the runner fixings rather than assuming them.
The rest of the stair landing
Each of these is one session on its own.
- The Landing Surface or Console
- The Wall and Display Zone
- The Stair and Floor Path, you are here
The Stair Landing in full, with what each of the 3 zones is for
The stair landing as a deck of 40 cards: the frictions people report in each zone, the root cause behind each one, and the timed action that clears it. Free to read or print.
Zones that do the same job, elsewhere in the house
Different room, different name, same real job. Each one is its own page because the room around it changes what actually works.
- The Floor and Circulation Path in the living room
- The Door, Mat, and Immediate Floor in the entryway
- The Surface, Rail, and Safety Zone in the patio or deck
Related reading
- Is mail piling up on this exact surface?
- Is the everyday item in this zone actually the easy one to reach?
- Does this zone keep running out of something?
- Does more than one person use this zone?
- Why the standard above names one home per category
Questions people ask about this zone
- How long does it take to reset the steps?
- One session: 30-45 min, most of it in Safety, walking the flight tread by tread and fixing what you find.
- What does a finished steps look like?
- Every tread bare from nose to riser, including the bottom three steps that usually stage things. The runner lies flat with no lifted corner at the turn. The handrail runs unbroken and unobstructed from the top newel post to the bottom, with no bag, coat or dog lead hung on either post. Both switches work, so the top step and the bottom step are lit before you take them.
- What is the hardest call to make in the steps?
- If your stairs have a runner and one corner has lifted or one rod has worked loose, you have almost certainly pressed it back down and carried on. That is the decision you keep deferring, and it is the wrong shape, because a runner that has lifted once has already told you what it will do again. Choose today between two honest options and refuse the third. Either refix it properly along its whole length, with rods or full-width tape on every tread rather than a patch on the one failed corner, or take it up entirely and live with bare treads. Bare wood you know is slippery beats a runner you have quietly stopped trusting, because you adjust your step for the first and not the second. The one thing you may not do is press it down again and wait.
- How do you keep the steps from getting cluttered again?
- Bare treads at full width, runner flat and fixed the whole way, handrail clear from newel to newel, and working light at both ends. When you head up to bed, you go with a hand on the rail and nothing left standing on a tread behind you.
- What do you need to clean the steps?
- Compact vacuum with attachments; Color-coded microfiber cloth set; Floor-material-compatible cleaner; Neutral pH multi-surface cleaner; Portable cleaning caddy.
- What do you clean first in the steps?
- The handrail, full length including the underside. Start with the rail. Wipe it the whole length from the top newel to the bottom, and do not skip the underside your fingers wrap around, which carries the oil off every hand that has ever used it.
- Is there a fall risk in the steps?
- A lifted runner corner, a loose handrail bracket, or a dead bulb over the top step. Each one is a fall on the hardest surface in the house, and they tend to arrive together, at night.
- Is there a fall, cut, or crush risk in the steps?
- Carrying a laundry basket or a box you cannot see over means going down blind with no free hand for the rail. Anything parked on the bottom three steps is invisible to that person.
- Is there a water and electricity risk in the steps?
- Changing the bulb over the stairwell means standing high on a flight with a live fitting overhead. Switch the light off at the wall, let a hot bulb cool, and work from the landing on a properly footed ladder rather than balancing on a tread.
- Why does the steps do this: A lifted runner corner or a loose rod gets pressed back into place and left instead of actually refixed?
- Fixing it properly means clearing the whole flight and buying rods or tape, and that's a bigger job than the few minutes I have when I notice it, so start at Sort; Nothing prompts a proper refix, so pressing it down becomes the whole routine, so start at Sustain; I've stopped seeing the lifted corner as a real hazard because it's been like that for a while, so start at Sort.
- Why does the steps do this: A bulb lighting the top or bottom step burns out and nobody replaces it until someone nearly misses a step in the dark?
- There's no spare bulb kept on hand for this fitting, so a burnout turns into a multi-day wait, so start at Standardize; Nobody checks the stairwell lighting on a schedule, it only gets noticed at night by accident, so start at Sustain; Nobody in the house is the one who's supposed to notice or replace it, so start at Sustain.
- Why does the steps do this: Laundry, shoes or a delivery box gets set down on the bottom three steps instead of carried the rest of the way?
- The thing on the step has no assigned home on the floor it's actually headed to, so start at Straighten; There's no agreed rule that stairs are never used as a shelf, so start at Standardize; Carrying it needs a free hand, and the hand that should be on the rail is already full, so it gets set down instead, so start at Safety.
When you want it off the screen
Carry The Stair and Floor Path into the room
The method above is complete and free. The Whole House Print Pack puts The Stair and Floor Path and the other 113 micro zones on 684 printable cards, so the steps you just read are not stuck behind a phone screen while your hands are full.
The Print Pack, 19 dollarsJust this zone, 4 dollarsOr draw a card free
The Stair and Floor Path on its own is 4 dollars for 6 cards. All 114 micro zones is 19 dollars for 684. The whole house is the better buy; the single zone is here so you can take only what you are working on.
If The Stair and Floor Path keeps fighting back, the real problem usually sits somewhere else in the room. A one hour virtual consult is 250 dollars: we find the function, the friction and the root cause together, and you keep a written standard for the space.
See what a consult covers, 250 dollars
Not ready to pay for that either? Ask which zone first, free