Patio or Deck micro zone
The Grill and Outdoor Cooking Zone
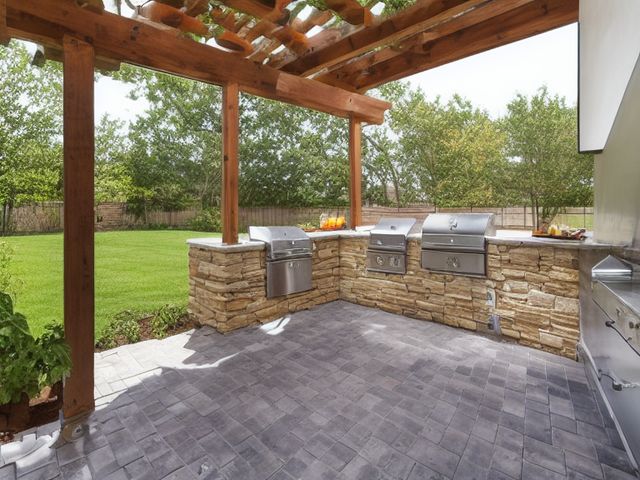
The grill station, in the Patio or Deck. Cook over fire without leaving the grill to find a tool or wondering if there is gas. Grates scraped bare, grease tray emptied and back in its rails, four tools on the grill's own hooks and no fifth anywhere, the propane tank upright with its level written on the collar, and a clear arm's length between the grill body and the siding, railing, and umbrella canopy.
One session: 60-90 min, most of it in Shine, because the grease tray and burner tubes are the real work.
The short version
- Sort. Empty the side shelf and the cabinet under the grill
- Straighten. Hang the tongs and spatula on the grill's own hooks
- Shine. Burn the grates off, then pull the flavorizer bars and scrape the grease tray
- Safety. Brush soapy water onto the propane hose and the regulator fitting, then open the valve
- Standardize. The grease tray gets emptied on a fixed count of cooks
- Sustain. Every time you close the lid at the end of a cook
Each step in full, with what to have on hand and what done looks like, below.
Where it is
Patio or Deck
6 micro zones, one session each
- 1The Outdoor Seating Zone
- 2The Grill and Outdoor Cooking Zone
- 3The Outdoor Dining Zone
- 4The Garden and Plant Care Zone
- 5The Outdoor Storage Zone
- 6The Surface, Rail, and Safety Zone
What done looks like
Cook over fire without leaving the grill to find a tool or wondering if there is gas.
- Grates scraped bare
- Grease tray emptied and back in its rails
- Four tools on the grill's own hooks and no fifth anywhere
- The propane tank upright with its level written on the collar
+ 1 more on this page
What done looks like
Grates scraped bare, grease tray emptied and back in its rails, four tools on the grill's own hooks and no fifth anywhere, the propane tank upright with its level written on the collar, and a clear arm's length between the grill body and the siding, railing, and umbrella canopy.
Common items here
- One long-handled tong, one spatula, one thermometer, one basting brush, on the grill's own hooks
- The propane tank, upright, its level written on the collar
- The grease tray, emptied and back in its rails
Check these before you start
- Burn or fireAccumulated grease in the tray and drip pan is what turns a normal flare-up into a fire, and a grill within reach of siding, decking rail, or a canopy gives that fire somewhere to go. A cracked or perished propane hose leaks at the fitting, which is why the soapy water test happens before the first cook of the season and not after you smell gas.
- Poison, choke, or strangleBristles shed from a worn wire brush stick to the grates and then to food, and a swallowed bristle is a genuine emergency.
Which of these is true here?
Match what you are actually seeing in the grill station to why it keeps happening, then start at the pass that fixes that, not the top of the list.
The shelf and the cabinet under the grill hold three sets of tongs, a thermometer with a dead battery, and a sauce bottle that has ridden through a whole summer of outdoor heat, while only one of each tool ever actually gets picked up mid-cook
- A cook needs at least one of everything, and buying a backup without checking whether the first one still works is how the second and third arrived. Confirm in 30 seconds: Count what you used in the past month. If the honest number is a third of what is stored here, the space is not too small. If that checks out, start at Sort.
- Nothing has ever forced a look at what is actually behind that closed cabinet door, so it just accumulates unseen. Confirm in 30 seconds: Open the door and, without moving anything, name what is at the back. If you cannot, that stock is invisible. If that checks out, start at Straighten.
- Whoever is cooking grabs the tool that is already sitting out from last time and never has a reason to sort through the rest. Confirm in 30 seconds: Name the moment it happens. If the answer is "when I get round to it", there is no trigger and it will not survive a bad week. If that checks out, start at Sustain.
There are two or three propane tanks against the wall and nobody is sure which ones actually have gas left, so a fresh one gets bought before the tanks get checked
- The collar has no level marked on it and nobody has weighed one on the bathroom scale, so guessing feels faster than checking. Confirm in 30 seconds: Ask two people in the house to describe this zone when it is finished. Two different answers means there is no standard to keep. If that checks out, start at Standardize.
- An empty tank still looks and feels heavy enough to seem fine, so it runs out mid-cook instead of getting caught ahead of time. Confirm in 30 seconds: Find the last one of something you use daily. If nothing tells you it is the last one, you will find out at the worst possible moment. If that checks out, start at Standardize.
- Checking the real level means finding the scale, doing the subtraction, and marking the collar; buying a new one skips all of that. Confirm in 30 seconds: Fetch it once and count the movements. More than two and the storage is charging you rent every time. If that checks out, start at Straighten.
The flame runs yellow and lazy along one side of the burner, and the grease tray under the grill has not been scraped out in longer than anyone can say
- A grease tray that is overdue is exactly what turns a normal flare-up into a real fire, especially with the grill sitting close to the siding or the rail. Confirm in 30 seconds: Look for the four: a blade your hand would meet, weight above shoulder height, heat beside something that burns, and an unsafe placement near a child's reach. If that checks out, start at Safety.
- Nobody wants to reach up into the burner tubes or pull the flavorizer bars while they are still greasy, so that part gets skipped every time. Confirm in 30 seconds: Time how long it actually takes to reach and wipe the surface. If it requires moving something first, that cost is why it is skipped. If that checks out, start at Shine.
- There is no tracked count of cooks between empties, so it only gets done whenever someone happens to notice the smell. Confirm in 30 seconds: Name the moment it happens. If the answer is "when I get round to it", there is no trigger and it will not survive a bad week. If that checks out, start at Sustain.
Only have 15 minutes? Empty the side shelf and the cabinet completely, wipe the grease tray out, and hang the one tong, one spatula, one thermometer, and one basting brush you are keeping back on the grill's own hooks. Victory: The grill's own hooks hold exactly one tong, one spatula, one thermometer, and one basting brush, and the grease tray sits empty in its rails.
The six passes, in order
Work them in this order. Sorting after you have arranged things means arranging things you were about to remove.
This zone's full kit list is below, after the method. Skim it first if you would rather gather everything before you start.
Sort
Decide what stays. Everything else leaves the zone now.
Empty the side shelf and the cabinet under the grill. Out comes a bag of dried-out lighter cubes, three sets of tongs, a thermometer with a dead battery, and sauce bottles that spent a whole summer at outdoor temperature. Keep one long-handled tong, one spatula, one instant-read thermometer, and one basting brush.
What to store it in, now that you know what you are keeping
Bins and shelves are for what Sort left behind, not a stand-in for it. Buying storage before sorting means buying a container for things you have not yet decided to keep.
Only if it applies to the grill station: 4 more
Not every home needs these for the grill station. Each one is here because some do, and the reason is next to it.
- Grill Tool Rack Create safe homes for outdoor cooking tools, in the Straighten, Standardize and Sustain passes. Do not overload; anchor wall-mounted or tall systems where required.
- Deck Box Protect outdoor cushions and patio items, in the Straighten, Standardize and Sustain passes. Do not overload; anchor wall-mounted or tall systems where required.
- Garden Tool Caddy Contain small garden tools and supplies, in the Straighten, Standardize and Sustain passes. Do not overload; anchor wall-mounted or tall systems where required.
- Hose Reel Control garden hose and protect walkways, in the Straighten, Standardize and Sustain passes. Do not overload; anchor wall-mounted or tall systems where required.
Straighten
Give what stays a home, placed where the hand actually reaches.
Hang the tongs and spatula on the grill's own hooks so you never walk away from a lit grill to go looking. Fuel keeps its distance from heat: the propane tank upright and outdoors, the charcoal bag sealed and off the ground, the chimney starter beside it.
Shine
Clean it, and use the cleaning to inspect what you cannot see when it is full.
Burn the grates off, then pull the flavorizer bars and scrape the grease tray and drip pan out into the bin rather than leaving a rendered layer to feed the next flare-up. While the burners are exposed, look up into the tubes; a spider web in a venturi tube is exactly why the flame runs yellow and lazy along one side.
Surface by surface, all 8 of them, with what to use on each.
Safety
Make the zone safe for everybody who uses it, including the shortest person.
Brush soapy water onto the propane hose and the regulator fitting, then open the valve. Bubbles mean replace the hose, not tighten it and hope. Retire any wire brush whose bristles you can pull free with your fingers, because a loose bristle ends up in food, and switch to a scraper or a coiled brush.
Standardize
Write down the best way you know today, so it survives you forgetting.
The grease tray gets emptied on a fixed count of cooks, marked off on a card taped inside the cabinet door. A tank is written full or empty in marker on its collar the same day it changes state, so nobody has to guess by lifting it.
Sustain
Attach the reset to something that already happens, so it keeps itself.
Every time you close the lid at the end of a cook, scrape the grates while they are still hot and glance into the tray before you walk away. A minute, by whoever cooked. The card inside the cabinet door counts the cooks between grease tray emptyings, so that job has a written trigger rather than a smell. Slip is a fifth tool appearing on the hooks, or a tank collar with no level written on it. Recovery is scraping cold, which is genuinely worse. The window closes as the metal cools.
The kit this zone called for
Everything above assumed you had these already. Types of thing, not brands: anything you already own that does the job is the right one to use.
- Grill grate scraper or coiled brush Shine, Safety Bristle-free by design. A wire brush that sheds a bristle onto a grate can put it into food, which is why this type replaces one rather than supplementing it. Retire any brush whose bristles pull free by hand..
- Food-area degreaser Shine Rinse food-contact surfaces.
- Impact-rated safety glasses Safety Use rated protection appropriate to task.
- Color-coded microfiber cloth set ×12 Shine Wash by use color; avoid fabric softener.
- Neutral pH multi-surface cleaner Shine, Sustain Verify surface compatibility; lock around children and pets.
- Compact vacuum with attachments Shine Use appropriate attachment.
- Keep, Relocate, Donate, Recycle, Trash container set ×5 Sort Do not block exits.
- Portable cleaning caddy Straighten, Shine, Sustain Secure chemicals from children and pets.
- Portable label maker Standardize, Sustain Follow surface and adhesive guidance.
- Removable write-on labels Standardize Test on delicate finishes.
Only if it applies to the grill station: 2 more
- Floor-material-compatible cleaner Shine, Sustain Match cleaner to floor material.
- Moisture Absorber or Humidity Monitor Safety, Sustain Install and use according to product instructions.
The tank you are not sure about
You have two propane tanks and no idea which has gas in it, so you keep buying a third and the collection grows against the wall. Settle it with a bathroom scale. The tare weight is stamped on the collar as TW and a number; weigh the tank, subtract that number, and what remains is propane. If what is left would not carry you through one long cook with guests, that is a refill errand, not a spare. Write the answer on the collar in marker, and write it again the day a tank comes back from the exchange. While you are reading the collar, find the date stamp: tanks have a requalification life and the exchange counter will simply refuse an old one, which is worth knowing now rather than on a Saturday with people arriving. Two tanks is the right number. Anything beyond two is a storage problem pretending to be preparedness.
Cleaning it properly, surface by surface
A grill is cleaned from the grease outward. Burn the grates, pull the trays, and get the rendered fat out to the bin before it feeds the next flare-up.
Work down, not across. Whatever comes off a high surface lands on the one below it, so cleaning the floor first means cleaning it twice.
Carry these in with you. Food-area degreaser; Neutral pH multi-surface cleaner; Color-coded microfiber cloth set; Floor-material-compatible cleaner; Portable cleaning caddy; Grate scraper or coiled grill brush; Nylon brush; Hot soapy water and bucket.
- The cooking grates
Run the burners hot for ten minutes to char the residue to ash, then scrape the bars clean with a grate scraper or a coiled brush rather than a wire one. Lift them out and finish with the degreaser and hot water. - The flavorizer bars and the firebox interior
Pull the bars and scrape the baked-on crust off them into the bin. Scrape the loose carbon flakes off the firebox floor down toward the grease channel while everything is out. - The burner tubes and venturi openings
With the bars lifted, look straight up into each burner tube and the venturi opening at the valve end, and brush any nest debris out of the mouth of the tube so the gas runs clean. - The grease tray and drip pan
Slide the tray out of its rails and scrape the rendered layer into the bin, then wash both the tray and the drip pan with the food-area degreaser and hot soapy water and dry them before they go back. - The lid interior
The flaking on the underside of the lid is carbonized grease, not paint, so brush it down into the firebox with a nylon brush and wipe the last film with a degreaser cloth. - The exterior body, side shelves, tool hooks, and knobs
Degrease the lid and body, then go over the side shelves, the hooks, and the control knobs with the neutral pH cleaner and a microfiber cloth so no grease is left to gather dust. - The propane tank collar and the cart base
Wipe the tank and its collar down with the neutral pH cleaner, then wipe the grease and grit off the cart legs and the wheels so nothing tracks grime as the grill is rolled. - The decking or pad directly under the grill
Grease spatters onto the floor around a grill, so clean the pad or boards beneath it with the floor-material-compatible cleaner before the marks set and turn slick.
How to clean anything else in the house, surface by surface.
Inspect as you clean. Cleaning is the only time you see the zone empty, so use it.
- A spider web or debris blocking a venturi tube is what makes the flame run yellow and lazy along one side. If a burner cooks unevenly, flag that tube.
- Rust flaking through the firebox floor, or a hole opening in it, means the base is failing where the heat and grease sit. Note where the light comes through.
- Grease that has pooled past the tray and soaked into the pad or the boards is a drip path the tray is no longer catching.
- A cracked or perished hose, or green corrosion crusting the regulator fitting, is worth flagging the moment you see it while wiping around the valve.
- Burner ports that are rusted or clogged on one side and clear on the other explain a flame that is strong at one end and absent at the other.
The standard that keeps it fixed
Four tools on the hooks, grease tray emptied on a written count of cooks, and the tank level marked on the collar.
Reset trigger. When you shut the lid at the end of a cook, scrape the hot grates and look in the tray.
How much the grill station can actually hold
Grates scraped bare, grease tray emptied and back in its rails, four tools on the grill's own hooks and no fifth anywhere, the propane tank upright with its level written on the collar, and a clear arm's length around the cooking box.
If there is a fifth tool, two of them do the same job. The arm's length of clearance is the one rule here with no flexibility in it, because that distance decides whether a flare-up is an event or an accident. Run the honest count.
When this does not describe your grill station
The passes above describe the ordinary case. Plenty of real households are not ordinary, and the fix is not to skip the method, it is to run it against a different starting shape.
- Charcoal rather than gas
- The tank rule becomes an ash rule: a metal ash can with a lid, emptied cold, never into a plastic bin or a bag. Ash that looks dead can hold heat for a day, and that is the most common way a deck fire starts.
- The grill sits close to the house wall, or under a roof
- Clearance stops being a preference and becomes the first thing you check. Measure what the manufacturer actually requires rather than guessing, and if the space cannot meet it the grill moves rather than the rule bending.
The rest of the patio or deck
Each of these is one session on its own.
- The Outdoor Seating Zone
- The Grill and Outdoor Cooking Zone, you are here
- The Outdoor Dining Zone
- The Garden and Plant Care Zone
- The Outdoor Storage Zone
- The Surface, Rail, and Safety Zone
The Patio or Deck in full, with what each of the 6 zones is for
The patio or deck as a deck of 68 cards: the frictions people report in each zone, the root cause behind each one, and the timed action that clears it. Free to read or print.
Zones that do the same job, elsewhere in the house
Different room, different name, same real job. Each one is its own page because the room around it changes what actually works.
Related reading
- Does this zone keep running out of something?
- Found a duplicate of something in this zone?
- Is one spot in this zone always the one you skip?
- Why this zone gets messy again
- Moving three things to get to the one you need?
Questions people ask about this zone
- How long does it take to reset the grill station?
- One session: 60-90 min, most of it in Shine, because the grease tray and burner tubes are the real work.
- What does a finished grill station look like?
- Grates scraped bare, grease tray emptied and back in its rails, four tools on the grill's own hooks and no fifth anywhere, the propane tank upright with its level written on the collar, and a clear arm's length between the grill body and the siding, railing, and umbrella canopy.
- What is the hardest call to make in the grill station?
- You have two propane tanks and no idea which has gas in it, so you keep buying a third and the collection grows against the wall. Settle it with a bathroom scale. The tare weight is stamped on the collar as TW and a number; weigh the tank, subtract that number, and what remains is propane. If what is left would not carry you through one long cook with guests, that is a refill errand, not a spare. Write the answer on the collar in marker, and write it again the day a tank comes back from the exchange. While you are reading the collar, find the date stamp: tanks have a requalification life and the exchange counter will simply refuse an old one, which is worth knowing now rather than on a Saturday with people arriving. Two tanks is the right number. Anything beyond two is a storage problem pretending to be preparedness.
- How do you keep the grill station from getting cluttered again?
- Four tools on the hooks, grease tray emptied on a written count of cooks, and the tank level marked on the collar. When you shut the lid at the end of a cook, scrape the hot grates and look in the tray.
- What do you need to clean the grill station?
- Food-area degreaser; Neutral pH multi-surface cleaner; Color-coded microfiber cloth set; Floor-material-compatible cleaner; Portable cleaning caddy; Grate scraper or coiled grill brush; Nylon brush; Hot soapy water and bucket.
- What do you clean first in the grill station?
- The cooking grates. Run the burners hot for ten minutes to char the residue to ash, then scrape the bars clean with a grate scraper or a coiled brush rather than a wire one. Lift them out and finish with the degreaser and hot water.
- Is there a burn or fire risk in the grill station?
- Accumulated grease in the tray and drip pan is what turns a normal flare-up into a fire, and a grill within reach of siding, decking rail, or a canopy gives that fire somewhere to go. A cracked or perished propane hose leaks at the fitting, which is why the soapy water test happens before the first cook of the season and not after you smell gas.
- Is there a poison, choke, or strangle risk in the grill station?
- Bristles shed from a worn wire brush stick to the grates and then to food, and a swallowed bristle is a genuine emergency.
- Why does the grill station do this: The shelf and the cabinet under the grill hold three sets of tongs, a thermometer with a dead battery, and a sauce bottle that has ridden through a whole summer of outdoor heat, while only one of each tool ever actually gets picked up mid-cook?
- A cook needs at least one of everything, and buying a backup without checking whether the first one still works is how the second and third arrived, so start at Sort; Nothing has ever forced a look at what is actually behind that closed cabinet door, so it just accumulates unseen, so start at Straighten; Whoever is cooking grabs the tool that is already sitting out from last time and never has a reason to sort through the rest, so start at Sustain.
- Why does the grill station do this: There are two or three propane tanks against the wall and nobody is sure which ones actually have gas left, so a fresh one gets bought before the tanks get checked?
- The collar has no level marked on it and nobody has weighed one on the bathroom scale, so guessing feels faster than checking, so start at Standardize; An empty tank still looks and feels heavy enough to seem fine, so it runs out mid-cook instead of getting caught ahead of time, so start at Standardize; Checking the real level means finding the scale, doing the subtraction, and marking the collar; buying a new one skips all of that, so start at Straighten.
- Why does the grill station do this: The flame runs yellow and lazy along one side of the burner, and the grease tray under the grill has not been scraped out in longer than anyone can say?
- A grease tray that is overdue is exactly what turns a normal flare-up into a real fire, especially with the grill sitting close to the siding or the rail, so start at Safety; Nobody wants to reach up into the burner tubes or pull the flavorizer bars while they are still greasy, so that part gets skipped every time, so start at Shine; There is no tracked count of cooks between empties, so it only gets done whenever someone happens to notice the smell, so start at Sustain.
When you want it off the screen
Carry The Grill and Outdoor Cooking Zone into the room
The method above is complete and free. The Whole House Print Pack puts The Grill and Outdoor Cooking Zone and the other 113 micro zones on 684 printable cards, so the steps you just read are not stuck behind a phone screen while your hands are full.
The Print Pack, 19 dollarsJust this zone, 4 dollarsOr draw a card free
The Grill and Outdoor Cooking Zone on its own is 4 dollars for 6 cards. All 114 micro zones is 19 dollars for 684. The whole house is the better buy; the single zone is here so you can take only what you are working on.
If The Grill and Outdoor Cooking Zone keeps fighting back, the real problem usually sits somewhere else in the room. A one hour virtual consult is 250 dollars: we find the function, the friction and the root cause together, and you keep a written standard for the space.
See what a consult covers, 250 dollars
Not ready to pay for that either? Ask which zone first, free