Kitchen micro zone
The Cooking Zone
The stove area, in the Kitchen. The strip of space either side of the burners where cooking happens with your hands busy and heat already on. Oil, salt, and pepper within one reach of the burners. A utensil crock holding no more than six tools, every one of which you used this month. Pot holders on a hook you can find without looking, the spices you reach for weekly at the front of the rack, and a clear landing space beside the hob wide enough to set down a hot pan.
One session: 45-75 min, most of it in Shine, because degreasing the hood and the grates is slow work.
The short version
- Sort. Empty the utensil crock into a box and cook for a week
- Straighten. Arrange by the moment of need, not by shape
- Shine. Lift the burner grates off and soak them while you wash the splash wall
- Safety. Turn every pan handle inward so it cannot catch a sleeve
- Standardize. Photograph the hob and one step of surround in its ready state
- Sustain. The reset runs inside the cooking: while the pan comes up to heat
Each step in full, with what to have on hand and what done looks like, below.
Where it is
Kitchen
7 micro zones, one session each
- 1The Primary Prep Counter
- 2The Cooking Zone
- 3The Sink and Dishwashing Zone
- 4The Upper Cabinets
- 5The Lower Cabinets and Cookware
- 6The Utensil and Utility Drawers
- 7The Refrigerator and Freezer
What done looks like
The strip of space either side of the burners where cooking happens with your hands busy and heat already on.
- Oil, salt, and pepper within one reach of the burners
- A utensil crock holding no more than six tools, every one of which you used this month
- Pot holders on a hook you can find without looking, the spices you reach for weekly at the front of the rack, and a clear landing space beside the hob wide enough to set down a hot pan
What done looks like
Oil, salt, and pepper within one reach of the burners. A utensil crock holding no more than six tools, every one of which you used this month. Pot holders on a hook you can find without looking, the spices you reach for weekly at the front of the rack, and a clear landing space beside the hob wide enough to set down a hot pan.
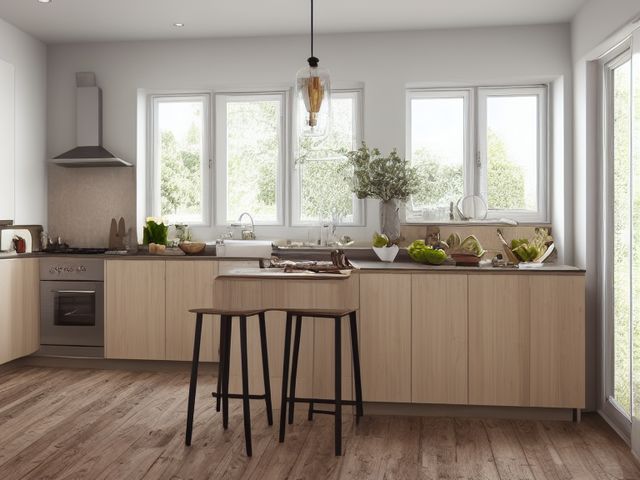
Common items here
- The utensil crock, holding six tools or fewer, every one used this month
- Oil, salt, and pepper, within one reach of the burners
- Pot holders, on a hook you can find without looking
- The spices you reach for weekly, at the front of the rack
Check these before you start
- Burn or fireOil left heating unattended, and a tea towel or a paper roll stored within reach of a live burner, are the two ways a kitchen fire actually starts. A gas burner that clicks without lighting is still releasing gas, and the usual reason is a burner cap knocked out of seat or a port blocked by boiled-over food, both of which happen during exactly the clean this pass asks for. After cleaning, light every burner once and watch for an even blue ring. A lazy yellow flame or a burner that will not catch is a call to a registered engineer, not a thing to adjust.
- Fall, cut, or crushA pan handle turned out over the front edge of the hob is at exactly the height a toddler grabs, and it comes down with the contents.
Which of these is true here?
Match what you are actually seeing in the stove area to why it keeps happening, then start at the pass that fixes that, not the top of the list.
I hunt for the turner with the pan hot
- The crock holds twenty tools and I use six. Confirm in 30 seconds: Count what you used in the past month. If the honest number is a third of what is stored here, the space is not too small. If that checks out, start at Sort.
- The tool I need lives on the other side of the kitchen. Confirm in 30 seconds: Stand where you use it and count the steps to where it is kept. More than two is the wrong cabinet. If that checks out, start at Straighten.
- The drawer is a jumble and nothing shows. Confirm in 30 seconds: Open the door and, without moving anything, name what is at the back. If you cannot, that stock is invisible. If that checks out, start at Straighten.
Nowhere to put a hot pan down
- The landing space has slowly filled with other things. Confirm in 30 seconds: Put back only what belongs here. If it still will not close, or still stacks four deep, the capacity is the problem, not the habit. If that checks out, start at Sort.
- Those things have no home of their own. Confirm in 30 seconds: Ask where one specific item lives. If two people answer differently, or nobody answers, it has no home. If that checks out, start at Straighten.
- Nobody calls that space anything, so it is fair game. Confirm in 30 seconds: Ask two people in the house to describe this zone when it is finished. Two different answers means there is no standard to keep. If that checks out, start at Standardize.
I buy spices I already own
- The front row hides the back row completely. Confirm in 30 seconds: Open the door and, without moving anything, name what is at the back. If you cannot, that stock is invisible. If that checks out, start at Straighten.
- Nothing tells me what is nearly gone. Confirm in 30 seconds: Find the last one of something you use daily. If nothing tells you it is the last one, you will find out at the worst possible moment. If that checks out, start at Standardize.
- There are more jars here than the rack was built for. Confirm in 30 seconds: Count what you used in the past month. If the honest number is a third of what is stored here, the space is not too small. If that checks out, start at Sort.
Only have 15 minutes? Put oil, salt and one turner back within a single reach, and clear the landing space. Victory: With your feet still, you can reach oil, salt and a turner, and you have somewhere to set a hot pan down.
The six passes, in order
Work them in this order. Sorting after you have arranged things means arranging things you were about to remove.
This zone's full kit list is below, after the method. Skim it first if you would rather gather everything before you start.
Sort
Decide what stays. Everything else leaves the zone now.
Empty the utensil crock into a box and cook for a week, returning to the crock only what your hand actually reaches for. The warped plastic turner, the corn holders, and the third pair of tongs are still in the box at the end of the week, which is your answer.
What to store it in, now that you know what you are keeping
Bins and shelves are for what Sort left behind, not a stand-in for it. Buying storage before sorting means buying a container for things you have not yet decided to keep.
Only if it applies to the stove area: 5 more
Not every home needs these for the stove area. Each one is here because some do, and the reason is next to it.
- Lid Organizer Separate cookware or food-container lids, in the Straighten, Standardize and Sustain passes. Do not overload; anchor wall-mounted or tall systems where required.
- Pan and Bakeware Divider Store cookware and bakeware vertically, in the Straighten, Standardize and Sustain passes. Do not overload; anchor wall-mounted or tall systems where required.
- Spice Organizer Make spices visible and retrievable, in the Straighten, Standardize and Sustain passes. Do not overload; anchor wall-mounted or tall systems where required.
- Airtight Food Container Set Protect dry goods and improve inventory visibility, in the Straighten, Standardize and Sustain passes. Do not overload; anchor wall-mounted or tall systems where required.
- Drawer Divider Set Create visible subcategories in shallow drawers, in the Straighten, Standardize and Sustain passes. Do not overload; anchor wall-mounted or tall systems where required.
Straighten
Give what stays a home, placed where the hand actually reaches.
Arrange by the moment of need, not by shape. Oil, salt, and the turner within one reach of the burner, spices in a shallow drawer or tiered rack where you read the lids from above rather than shuffling jars, pans stored on the side you plate from.
Shine
Clean it, and use the cleaning to inspect what you cannot see when it is full.
Lift the burner grates off and soak them while you wash the splash wall and the underside of the hood with dish soap. Take the hood filter out and run it through hot soapy water, because a saturated filter stops pulling steam and starts dripping it back down.
Surface by surface, all 8 of them, with what to use on each.
Safety
Make the zone safe for everybody who uses it, including the shortest person.
Turn every pan handle inward so it cannot catch a sleeve or a small hand reaching up. Keep the tea towel, the paper roll, and the oil bottle off the burner side of the hob, and know where the fire blanket or extinguisher is before a pan is smoking. If the hob burns gas, three things belong in this pass. Know where the shutoff valve is before you need it, usually behind or beneath the appliance. Check that each burner actually lights rather than clicking unlit, because a burner left running unlit fills a room quietly. And if you ever smell gas, do not touch a light switch or anything electrical, open a window, leave, and call the emergency number on your supplier's bill from outside. Repairs and fittings are a licensed job, always.
Standardize
Write down the best way you know today, so it survives you forgetting.
Photograph the hob and one step of surround in its ready state and tape the photo inside the nearest cabinet door, so ready is a picture anyone can match rather than a standard only you hold.
Sustain
Attach the reset to something that already happens, so it keeps itself.
The reset runs inside the cooking: while the pan comes up to heat, the spice goes back to the front of the rack and any loose utensil drops into the crock. Whoever is cooking does it, in time already spent waiting. The signal is the landing space, and if there is nowhere clear to set a hot pan down the zone has slipped dangerously. Recovery is thinning the crock back to six tools, two minutes at the sink. Mid cook you cannot put anything away, so everything you touch waits for a moment nobody wants afterwards.
The kit this zone called for
Everything above assumed you had these already. Types of thing, not brands: anything you already own that does the job is the right one to use.
- Food-area degreaser Shine Rinse food-contact surfaces.
- Color-coded microfiber cloth set ×12 Shine Wash by use color; avoid fabric softener.
- Neutral pH multi-surface cleaner Shine, Sustain Verify surface compatibility; lock around children and pets.
- Compact vacuum with attachments Shine Use appropriate attachment.
- Keep, Relocate, Donate, Recycle, Trash container set ×5 Sort Do not block exits.
- Portable cleaning caddy Straighten, Shine, Sustain Secure chemicals from children and pets.
- Portable label maker Standardize, Sustain Follow surface and adhesive guidance.
- Removable write-on labels Standardize Test on delicate finishes.
The spice rack you are not honest about
Every cook keeps jars bought for one recipe from one holiday. Open them and smell them, one by one, over the bin. Ground spices fade first, and if a jar smells of dust rather than of itself, it is no longer seasoning anything you cook, and keeping it does not recover what you paid. Then make the harder call underneath: keep spices for the food you cooked in the last year, not the food you imagine cooking. If you want that cuisine back, buy the two spices fresh on the day you cook it. A rack you can read is worth more than a rack that is complete.
Cleaning it properly, surface by surface
Grease is the whole job here, and it hides upward. Get the burner grates soaking first so they clean themselves while you tackle the wall and the hood, and remember the hood filter, because a saturated one stops pulling steam and starts dripping it back at you.
Work down, not across. Whatever comes off a high surface lands on the one below it, so cleaning the floor first means cleaning it twice.
Carry these in with you. Food-area degreaser; Color-coded microfiber cloth set; Neutral pH multi-surface cleaner; Small detail brush set; Portable cleaning caddy.
- The extractor hood, its underside, and the grease filter
Start at the top. Lift the metal filter out and run it through hot water with the food-area degreaser, letting it soak while you work, because that soak does what scrubbing cannot. Spray the underside and face of the hood with degreaser, give it the label dwell time, then wipe down with a microfiber cloth and finish with a clean damp pass. - The splash wall behind the hob
Work top to bottom and back to front. Spray the splash wall with degreaser, let it sit, then wipe from the top down so the loosened grease runs toward the hob and not onto clean wall. Repeat on any spot where a fine spatter has baked hard. - The burner grates and caps
Lift the grates and caps off and set them to soak in hot soapy water at the start. Once softened, scrub the baked rings with a detail brush, rinse, and dry them fully before they go back so they do not rust onto the hob. - The hob surface, the burner wells, and the control knobs
With the grates off, degrease the exposed hob and work the burner wells where boil-overs bake into a ring. Pull the knobs off if they lift, wash them, and run a detail brush around the knob stems where sticky grime collars them. - The oven door front, its handle, and the control panel
Wipe the oven door front and its glass window with a neutral pH cloth, then a clean damp buff so no film clouds the glass you check a roast through. Wipe the handle where hands pull it, and clean the control panel and dials with a barely damp cloth rather than a wet one, so nothing runs in behind the knobs. - The utensil crock, the pot-holder hook, and the front of the spice rack
Empty the utensil crock, wash and dry it, and wipe each tool before it goes back. Wipe the pot-holder hook and the fronts and shoulders of the spice jars with a damp neutral pH cloth, since airborne grease settles into a tacky coat on everything standing near the burners. - The clear landing space beside the hob
Finish with the stretch of counter you set hot pans down on. Degrease it, wipe it, and dry it, so the one surface a hot pan lands on is never slick. - The microwave cavity, its turntable, and the door seal
Soften first, scrub second. Heat a bowl of water inside for a few minutes and leave the door shut for five more, so the steam lifts what is baked on and you are not chiselling. Lift the turntable and its roller ring out and wash them in the sink. Then wipe the cavity with a microfiber cloth and neutral pH multi-surface cleaner, starting with the CEILING, which is where splatter lands and where almost nobody looks. Finish with a detail brush along the door seal and the latch recess, and wipe the vent grille on the top or side where a film of grease collects. Nothing abrasive anywhere inside, and never a spray aimed at the vents.
How to clean anything else in the house, surface by surface.
Inspect as you clean. Cleaning is the only time you see the zone empty, so use it.
- A hood filter so grease-soaked it stays soft and drips, and a fan behind it that sounds strained or barely moves air.
- A burner that lights slow, burns yellow and sooty, or a grate that rocks on its seat.
- Scorching, discoloring, or bubbling paint on the splash wall or the hood underside where heat is building.
- A chip, a crack, or a spidered line in the hob surface or its enamel, found once the baked-on ring is cleared.
- A frayed or heat-stiffened cord on any appliance parked on the burner side of the counter.
The standard that keeps it fixed
Oil, salt, and your turner within one reach of the burner, no more than six tools in the crock, handles turned in, and a clear landing space beside the hob at all times.
Reset trigger. Every time you put a pan on to heat.
How much the stove area can actually hold
A utensil crock holding six tools or fewer, every one used in the last month, and a landing space beside the hob wide enough to set down a hot pan.
If the honest, used-this-month count is still more than six tools, or a genuinely hot-pan-sized landing space will not fit beside the hob without moving something else first, the counter beside the hob is smaller than the cooking this household actually does. Run the honest count.
When this does not describe your stove area
The passes above describe the ordinary case. Plenty of real households are not ordinary, and the fix is not to skip the method, it is to run it against a different starting shape.
- Renting with an old stove and no range hood
- Without a hood pulling grease away, the wall and cabinet fronts either side of the burners collect it faster. Wipe them on the same schedule as the Shine pass below rather than waiting for them to look obviously dirty.
- A small kitchen where the cooking zone and the prep counter are the same six feet
- The oil, salt, and utensil crock from this zone and the cutting board from the prep counter cannot both sit out at once in that space. Keep the crock at the back near the burners; the board comes out only while you are actively using it, then returns to a vertical slot rather than lying on the counter.
The rest of the kitchen
Each of these is one session on its own.
- The Primary Prep Counter
- The Cooking Zone, you are here
- The Sink and Dishwashing Zone
- The Upper Cabinets
- The Lower Cabinets and Cookware
- The Utensil and Utility Drawers
- The Refrigerator and Freezer
The Kitchen in full, with what each of the 7 zones is for
The kitchen as a deck of 72 cards: the frictions people report in each zone, the root cause behind each one, and the timed action that clears it. Free to read or print.
Zones that do the same job, elsewhere in the house
Different room, different name, same real job. Each one is its own page because the room around it changes what actually works.
Related reading
- Before you buy storage for this zone
- Does something in this zone actually get used somewhere else?
- Still does not fit, even after the honest count?
- Does this zone keep running out of something?
- Found a duplicate of something in this zone?
Questions people ask about this zone
- How long does it take to reset the stove area?
- One session: 45-75 min, most of it in Shine, because degreasing the hood and the grates is slow work.
- What does a finished stove area look like?
- Oil, salt, and pepper within one reach of the burners. A utensil crock holding no more than six tools, every one of which you used this month. Pot holders on a hook you can find without looking, the spices you reach for weekly at the front of the rack, and a clear landing space beside the hob wide enough to set down a hot pan.
- What is the hardest call to make in the stove area?
- Every cook keeps jars bought for one recipe from one holiday. Open them and smell them, one by one, over the bin. Ground spices fade first, and if a jar smells of dust rather than of itself, it is no longer seasoning anything you cook, and keeping it does not recover what you paid. Then make the harder call underneath: keep spices for the food you cooked in the last year, not the food you imagine cooking. If you want that cuisine back, buy the two spices fresh on the day you cook it. A rack you can read is worth more than a rack that is complete.
- How do you keep the stove area from getting cluttered again?
- Oil, salt, and your turner within one reach of the burner, no more than six tools in the crock, handles turned in, and a clear landing space beside the hob at all times. Every time you put a pan on to heat.
- What do you need to clean the stove area?
- Food-area degreaser; Color-coded microfiber cloth set; Neutral pH multi-surface cleaner; Small detail brush set; Portable cleaning caddy.
- What do you clean first in the stove area?
- The extractor hood, its underside, and the grease filter. Start at the top. Lift the metal filter out and run it through hot water with the food-area degreaser, letting it soak while you work, because that soak does what scrubbing cannot. Spray the underside and face of the hood with degreaser, give it the label dwell time, then wipe down with a microfiber cloth and finish with a clean damp pass.
- Is there a burn or fire risk in the stove area?
- Oil left heating unattended, and a tea towel or a paper roll stored within reach of a live burner, are the two ways a kitchen fire actually starts. A gas burner that clicks without lighting is still releasing gas, and the usual reason is a burner cap knocked out of seat or a port blocked by boiled-over food, both of which happen during exactly the clean this pass asks for. After cleaning, light every burner once and watch for an even blue ring. A lazy yellow flame or a burner that will not catch is a call to a registered engineer, not a thing to adjust.
- Is there a fall, cut, or crush risk in the stove area?
- A pan handle turned out over the front edge of the hob is at exactly the height a toddler grabs, and it comes down with the contents.
- Why does the stove area do this: I hunt for the turner with the pan hot?
- The crock holds twenty tools and I use six, so start at Sort; The tool I need lives on the other side of the kitchen, so start at Straighten; The drawer is a jumble and nothing shows, so start at Straighten.
- Why does the stove area do this: Nowhere to put a hot pan down?
- The landing space has slowly filled with other things, so start at Sort; Those things have no home of their own, so start at Straighten; Nobody calls that space anything, so it is fair game, so start at Standardize.
- Why does the stove area do this: I buy spices I already own?
- The front row hides the back row completely, so start at Straighten; Nothing tells me what is nearly gone, so start at Standardize; There are more jars here than the rack was built for, so start at Sort.
Watch this zone
The same steps as above, done on camera, with captions. Nothing is sent to YouTube until you press play.
When you want it off the screen
Carry The Cooking Zone into the room
The method above is complete and free. The Whole House Print Pack puts The Cooking Zone and the other 113 micro zones on 684 printable cards, so the steps you just read are not stuck behind a phone screen while your hands are full.
The Print Pack, 19 dollarsOr draw a card free
If The Cooking Zone keeps fighting back, the real problem usually sits somewhere else in the room. A one hour virtual consult is 250 dollars: we find the function, the friction and the root cause together, and you keep a written standard for the space.
See what a consult covers, 250 dollars
Not ready to pay for that either? Ask which zone first, free