Mudroom micro zone
The Shoe and Boot Storage
The shoe and boot storage, in the Mudroom. Holds the footwear actually being worn this season, and gives wet pairs somewhere to drain without soaking the floor. Two pairs per person on the rack, soles down and toes out, one lipped tray by the door holding whatever came in wet, and clear floor between the tray and the doorway.
One session: 30-45 min, most of it in Sort, pairing up and walking out-of-season pairs upstairs.
The short version
- Sort. Bring every pair in the house down to this floor and match them
- Straighten. One row per person, heaviest boots on the bottom row so nobody lifts them
- Shine. Tip the tray out into the garden and wash it
- Safety. A wet boot sole on a hard floor is the surest slip in this house
- Standardize. Two pairs per person at the door, wet on the tray, dry on the rack
- Sustain. Boots go soles down on the tray when you step
Each step in full, with what to have on hand and what done looks like, below.
Where it is
Mudroom
6 micro zones, one session each
- 1The Family Hook Zone
- 2The Bench and Transition Surface
- 3The Shoe and Boot Storage
- 4The Pet Station
- 5The Seasonal Outdoor Gear
- 6The Cleaning and Utility Zone
What done looks like
Holds the footwear actually being worn this season, and gives wet pairs somewhere to drain without soaking the floor.
- Two pairs per person on the rack
- Soles down and toes out
- One lipped tray by the door holding whatever came in wet
- Clear floor between the tray and the doorway
What done looks like
Two pairs per person on the rack, soles down and toes out, one lipped tray by the door holding whatever came in wet, and clear floor between the tray and the doorway.
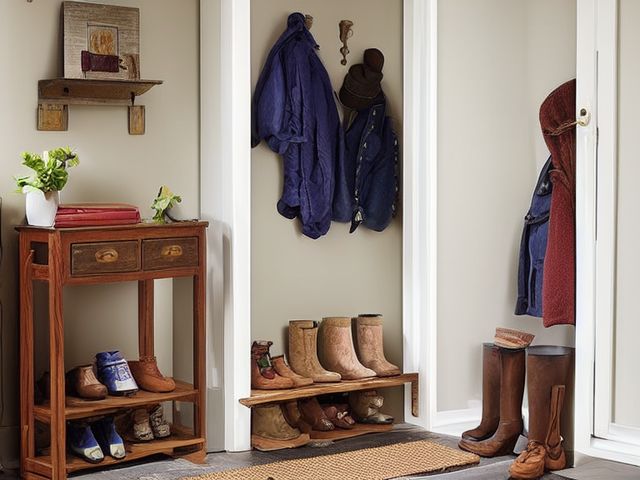
Common items here
- Two pairs per person, soles down and toes out
- One lipped tray, by the door, for wet pairs
- Clear floor, between the tray and the doorway
Check these before you start
- FallWet soles carried past the tray leave an invisible film on hard floor right where everyone turns towards the kitchen.
- Water and electricityA boot dryer or heated mat with its flex lying across the same floor the wet boots drip onto.
- Fall, cut, or crushStudded cleats stored soles up on a low shelf catch bare hands and feet at exactly the wrong height.
Which of these is true here?
Match what you are actually seeing in the shoe and boot storage to why it keeps happening, then start at the pass that fixes that, not the top of the list.
A pair of boots bought for a season that hasn't arrived yet is still taking a rack slot, even though nobody's worn them in the last four weeks
- They're expensive and undamaged, so nobody wants to be the one who decides they're not earning their spot. Confirm in 30 seconds: Pick up one piece. If your first thought is a verb (pay, sign, call, decide) rather than a place, it needs a decision, not a home. If that checks out, start at Sort.
- The rack is built for two pairs per person worn this season, and a pair waiting on weather that hasn't come is more than that job needs. Confirm in 30 seconds: Count what you used in the past month. If the honest number is a third of what is stored here, the space is not too small. If that checks out, start at Sort.
- Even after the honest four-week test clears out what shouldn't be here, one active kid's cleats, wellies and school shoes are already more than two pairs. Confirm in 30 seconds: Put back only what belongs here. If it still will not close, or still stacks four deep, the capacity is the problem, not the habit. If that checks out, start at Sort.
Wet soles are being carried past the tray onto the hard floor between it and the doorway, leaving an invisible film right where everyone turns toward the kitchen
- The tray isn't sitting exactly where boots actually come off, so it's a step or two short of where the wet-sole change actually happens. Confirm in 30 seconds: Stand where you use it and count the steps to where it is kept. More than two is the wrong cabinet. If that checks out, start at Straighten.
- A wet floor between the tray and the doorway is the surest slip in the house, which outranks how far the tray sits from the door. Confirm in 30 seconds: Look for the four: a blade your hand would meet, weight above shoulder height, heat beside something that burns, and an unsafe placement near a child's reach. If that checks out, start at Safety.
- Nobody's specifically checking that stretch of floor is bare and dry before it becomes a problem. Confirm in 30 seconds: Ask who resets this zone. If the honest answer is "whoever gets to it" or two names with no agreement, there is no owner. If that checks out, start at Sustain.
Dried mud has caked along the underside of the wire rail, exactly where the shine pass says you never look, because reaching it means unloading the whole rack first
- The underside of the rail costs more effort to reach than wiping the visible top shelf, so it never actually gets done. Confirm in 30 seconds: Time how long it actually takes to reach and wipe the surface. If it requires moving something first, that cost is why it is skipped. If that checks out, start at Shine.
- Nobody's checking that hidden underside for the rust or burr the inspect note warns about, since it's out of sight. Confirm in 30 seconds: Ask who resets this zone. If the honest answer is "whoever gets to it" or two names with no agreement, there is no owner. If that checks out, start at Sustain.
- It's been caked that way through enough cleaning passes that a crusted rail underside just reads as normal now. Confirm in 30 seconds: Ask someone who does not live here to name what looks out of place. If they see it instantly and you had stopped noticing, this is the cause. If that checks out, start at Sort.
Only have 15 minutes? Check the tray right now for any pair that has finished draining and move it up to the rack soles down, toes out. While you're there, pull any pair that hasn't been worn in the last four weeks and set it aside with today's date to move to the wardrobe. Victory: The tray holds only what's still actually wet, every dry pair sits on the rack soles down and toes out, and nothing unworn for four weeks is still taking a slot without a dated slip.
The six passes, in order
Work them in this order. Sorting after you have arranged things means arranging things you were about to remove.
This zone's full kit list is below, after the method. Skim it first if you would rather gather everything before you start.
Sort
Decide what stays. Everything else leaves the zone now.
Bring every pair in the house down to this floor and match them up. Outgrown pairs, split soles and unmatched singles leave today, and anything for the opposite season goes up to its owner's wardrobe rather than back on the rack.
What to store it in, now that you know what you are keeping
Bins and shelves are for what Sort left behind, not a stand-in for it. Buying storage before sorting means buying a container for things you have not yet decided to keep.
- Scraper and absorbent entry mat set Stop grit and water at the threshold in two stages, one mat outside to scrape and one inside to soak, in the Shine, Safety and Sustain passes. Lay flat with no curled edge, which is a trip hazard at a doorway; shake the outside mat and dry the inside one on the same day.
Only if it applies to the shoe and boot storage: 6 more
Not every home needs these for the shoe and boot storage. Each one is here because some do, and the reason is next to it.
- Deck Box Protect outdoor cushions and patio items, in the Straighten, Standardize and Sustain passes. Do not overload; anchor wall-mounted or tall systems where required.
- Broom and Tool Wall Clips Secure cleaning tools vertically, in the Straighten, Standardize and Sustain passes. Do not overload; anchor wall-mounted or tall systems where required.
- Board Game Component Bags Keep game pieces complete, in the Straighten, Standardize and Sustain passes. Do not overload; anchor wall-mounted or tall systems where required.
- Controller Dock Charge and contain game controllers, in the Straighten, Standardize and Sustain passes. Do not overload; anchor wall-mounted or tall systems where required.
- Toy Bin with Picture Label ×4 Support independent child cleanup, in the Straighten, Standardize and Sustain passes. Do not overload; anchor wall-mounted or tall systems where required.
- Front-Facing Book Bin ×2 Display children's books for easy access, in the Straighten, Standardize and Sustain passes. Do not overload; anchor wall-mounted or tall systems where required.
Straighten
Give what stays a home, placed where the hand actually reaches.
One row per person, heaviest boots on the bottom row so nobody lifts them, lightest slippers on top. Cleats and caked walking boots live on the tray only, never on a shelf where the dried mud drops onto the pair below.
Shine
Clean it, and use the cleaning to inspect what you cannot see when it is full.
Tip the tray out into the garden and wash it, because dried mud on a boot tray turns to dust and gets walked straight back inside. Wipe the rack rails and vacuum the floor of the rack where the grit lands.
Surface by surface, all 5 of them, with what to use on each.
Safety
Make the zone safe for everybody who uses it, including the shortest person.
A wet boot sole on a hard floor is the surest slip in this house, so the tray sits exactly where boots actually come off, not two steps further in. Keep the line from the door to the bench completely empty, because a shoe left out in a dark hallway is what people fall over at night.
Standardize
Write down the best way you know today, so it survives you forgetting.
Two pairs per person at the door, wet on the tray, dry on the rack. Mark the tray's footprint on the floor with tape so it goes back to the same spot after every clean.
Sustain
Attach the reset to something that already happens, so it keeps itself.
Boots go soles down on the tray when you step in, and when they are dry they move up to the shelf that evening, each person handling their own. The tray is the signal, and what you look for is dry boots still on it, because that means the second half of the habit stopped happening. Recovery is lifting them to the rack, ten seconds. Wet is the standing exception in this room and it never expires on its own. A pair that could not go up on Tuesday is still there in March.
The kit this zone called for
Everything above assumed you had these already. Types of thing, not brands: anything you already own that does the job is the right one to use.
- Stiff scrubbing brush Shine Work outdoors where the run-off goes to ground rather than into a household drain.
- Color-coded microfiber cloth set ×12 Shine Wash by use color; avoid fabric softener.
- Neutral pH multi-surface cleaner Shine, Sustain Verify surface compatibility; lock around children and pets.
- Compact vacuum with attachments Shine Use appropriate attachment.
- Keep, Relocate, Donate, Recycle, Trash container set ×5 Sort Do not block exits.
- Portable cleaning caddy Straighten, Shine, Sustain Secure chemicals from children and pets.
- Portable label maker Standardize, Sustain Follow surface and adhesive guidance.
- Removable write-on labels Standardize Test on delicate finishes.
Only if it applies to the shoe and boot storage: 2 more
- Anti-tip anchors and hardware Safety Install to manufacturer and wall-type requirements.
- Water-resistant permanent labels Standardize, Sustain Avoid irreplaceable surfaces.
The boots waiting for a winter that has not come
Everyone has a pair kept for conditions that never quite arrive: the proper wellies, the hiking boots worn twice, the smart shoes for the event you keep not going to. They are expensive and undamaged, which is why you will not decide. So separate the two questions. Keeping the pair is one decision; giving it a slot at the door is another. The rule for the door is simple: a pair earns a slot only if it has been on someone's feet in the last four weeks. Everything else goes to the wardrobe with today's date on a slip of paper tucked in the toe. When the season it was bought for has come and gone with that slip still in place, you have your answer, and it is not a hard one any more.
Cleaning it properly, surface by surface
Tip the boot tray out into the garden and wash it, because dried mud turns to dust and gets walked straight back in. Then wipe the rack rails and vacuum the grit that lands on the rack floor.
Work down, not across. Whatever comes off a high surface lands on the one below it, so cleaning the floor first means cleaning it twice.
Carry these in with you. Portable cleaning caddy; Compact vacuum with attachments; Color-coded microfiber cloth set; Neutral pH multi-surface cleaner; Floor-material-compatible cleaner; Garden hose or outdoor tap (not in this zone's list); Stiff scrubbing brush (not in this zone's list).
- The top of the rack and any upper shelf
Start at the top with a dry cloth to catch settled dust, then wipe the top surface with a cloth damp with neutral pH multi-surface cleaner. Work back to front so grit falls onto the lower shelves you have yet to reach. - The rack rails and shelves
Take the shoes off shelf by shelf. Wipe each rail and shelf with the damp cloth, getting the dried mud that cakes along the underside of a wire rail where you never look. Dry each rail before the shoes go back soles down and toes out. - The shoes and boots themselves
Knock caked mud off outdoors, brush the welts and treads clear, and wipe leather uppers with a barely damp cloth. Stand anything still wet on the tray to drain rather than back on the rack. - The lipped boot tray
Carry the tray outside, tip the salt and grit into the garden, and hose or scrub it with a stiff brush until the lip and corners run clean. Dry it off before it goes back exactly where boots come off, since a wet tray just moves the puddle. - The floor of the rack and the run to the door
Vacuum the rack floor with the crevice tool where grit and gravel collect, then wipe or mop the sealed floor from the tray to the doorway with the floor-material-compatible cleaner. Keep that stretch clear once it is dry.
How to clean anything else in the house, surface by surface.
Inspect as you clean. Cleaning is the only time you see the zone empty, so use it.
- If a boot dryer or heated mat lives here, flag any flex that is cracked, taped, or lying across the wet strip of floor where boots drip.
- As you clear each shelf, flag a rack shelf or rail that flexes, sags, or has a spot weld starting to give under the weight of loaded boots.
- Note black speckling or a sour smell inside a boot that has been left damp, and flag it as gear that never dried through.
- Watch for rust or a rough burr on a metal rack edge or on studded cleats stored soles up, and flag it before a hand meets it.
The standard that keeps it fixed
Two pairs per person at the door, wet stays on the tray, and the path from the door stays bare.
Reset trigger. When you step in and take your boots off.
How much the shoe and boot storage can actually hold
Two pairs per person on the rack, soles down and toes out, one lipped tray by the door for whatever came in wet, and clear floor between the tray and the doorway.
If the rack needs a third pair per person, the season has changed and nobody has moved the old pairs out. Shoes for a season you are not in belong in the closet, not by the door. Run the honest count.
When this does not describe your shoe and boot storage
The passes above describe the ordinary case. Plenty of real households are not ordinary, and the fix is not to skip the method, it is to run it against a different starting shape.
- A wet climate, so most pairs are wet most of the time
- The drip tray stops being an accessory and becomes the zone. Size it for the whole household rather than for one pair, give it a drain or a towel underneath, and empty it as part of the same trigger that resets the floor.
- Work boots that come in genuinely dirty
- Those get their own tray outside the door if there is any shelter at all, and the indoor rack stays for clean footwear. Mixing site boots with school shoes on one rack is how the floor inside the door never stays clean.
The rest of the mudroom
Each of these is one session on its own.
- The Family Hook Zone
- The Bench and Transition Surface
- The Shoe and Boot Storage, you are here
- The Pet Station
- The Seasonal Outdoor Gear
- The Cleaning and Utility Zone
The Mudroom in full, with what each of the 6 zones is for
The mudroom as a deck of 69 cards: the frictions people report in each zone, the root cause behind each one, and the timed action that clears it. Free to read or print.
Zones that do the same job, elsewhere in the house
Different room, different name, same real job. Each one is its own page because the room around it changes what actually works.
Related reading
- Is one spot in this zone always the one you skip?
- Still does not fit, even after the honest count?
- This zone's safety pass, in full
- Is mail piling up on this exact surface?
- Before you buy storage for this zone
Questions people ask about this zone
- How long does it take to reset the shoe and boot storage?
- One session: 30-45 min, most of it in Sort, pairing up and walking out-of-season pairs upstairs.
- What does a finished shoe and boot storage look like?
- Two pairs per person on the rack, soles down and toes out, one lipped tray by the door holding whatever came in wet, and clear floor between the tray and the doorway.
- What is the hardest call to make in the shoe and boot storage?
- Everyone has a pair kept for conditions that never quite arrive: the proper wellies, the hiking boots worn twice, the smart shoes for the event you keep not going to. They are expensive and undamaged, which is why you will not decide. So separate the two questions. Keeping the pair is one decision; giving it a slot at the door is another. The rule for the door is simple: a pair earns a slot only if it has been on someone's feet in the last four weeks. Everything else goes to the wardrobe with today's date on a slip of paper tucked in the toe. When the season it was bought for has come and gone with that slip still in place, you have your answer, and it is not a hard one any more.
- How do you keep the shoe and boot storage from getting cluttered again?
- Two pairs per person at the door, wet stays on the tray, and the path from the door stays bare. When you step in and take your boots off.
- What do you need to clean the shoe and boot storage?
- Portable cleaning caddy; Compact vacuum with attachments; Color-coded microfiber cloth set; Neutral pH multi-surface cleaner; Floor-material-compatible cleaner; Garden hose or outdoor tap (not in this zone's list); Stiff scrubbing brush (not in this zone's list).
- What do you clean first in the shoe and boot storage?
- The top of the rack and any upper shelf. Start at the top with a dry cloth to catch settled dust, then wipe the top surface with a cloth damp with neutral pH multi-surface cleaner. Work back to front so grit falls onto the lower shelves you have yet to reach.
- Is there a fall risk in the shoe and boot storage?
- Wet soles carried past the tray leave an invisible film on hard floor right where everyone turns towards the kitchen.
- Is there a water and electricity risk in the shoe and boot storage?
- A boot dryer or heated mat with its flex lying across the same floor the wet boots drip onto.
- Is there a fall, cut, or crush risk in the shoe and boot storage?
- Studded cleats stored soles up on a low shelf catch bare hands and feet at exactly the wrong height.
- Why does the shoe and boot storage do this: A pair of boots bought for a season that hasn't arrived yet is still taking a rack slot, even though nobody's worn them in the last four weeks?
- They're expensive and undamaged, so nobody wants to be the one who decides they're not earning their spot, so start at Sort; The rack is built for two pairs per person worn this season, and a pair waiting on weather that hasn't come is more than that job needs, so start at Sort; Even after the honest four-week test clears out what shouldn't be here, one active kid's cleats, wellies and school shoes are already more than two pairs, so start at Sort.
- Why does the shoe and boot storage do this: Wet soles are being carried past the tray onto the hard floor between it and the doorway, leaving an invisible film right where everyone turns toward the kitchen?
- The tray isn't sitting exactly where boots actually come off, so it's a step or two short of where the wet-sole change actually happens, so start at Straighten; A wet floor between the tray and the doorway is the surest slip in the house, which outranks how far the tray sits from the door, so start at Safety; Nobody's specifically checking that stretch of floor is bare and dry before it becomes a problem, so start at Sustain.
- Why does the shoe and boot storage do this: Dried mud has caked along the underside of the wire rail, exactly where the shine pass says you never look, because reaching it means unloading the whole rack first?
- The underside of the rail costs more effort to reach than wiping the visible top shelf, so it never actually gets done, so start at Shine; Nobody's checking that hidden underside for the rust or burr the inspect note warns about, since it's out of sight, so start at Sustain; It's been caked that way through enough cleaning passes that a crusted rail underside just reads as normal now, so start at Sort.
When you want it off the screen
Carry The Shoe and Boot Storage into the room
The method above is complete and free. The Whole House Print Pack puts The Shoe and Boot Storage and the other 113 micro zones on 684 printable cards, so the steps you just read are not stuck behind a phone screen while your hands are full.
The Print Pack, 19 dollarsJust this zone, 4 dollarsOr draw a card free
The Shoe and Boot Storage on its own is 4 dollars for 6 cards. All 114 micro zones is 19 dollars for 684. The whole house is the better buy; the single zone is here so you can take only what you are working on.
If The Shoe and Boot Storage keeps fighting back, the real problem usually sits somewhere else in the room. A one hour virtual consult is 250 dollars: we find the function, the friction and the root cause together, and you keep a written standard for the space.
See what a consult covers, 250 dollars
Not ready to pay for that either? Ask which zone first, free