Primary Bathroom micro zone
The Under-Sink Cabinet
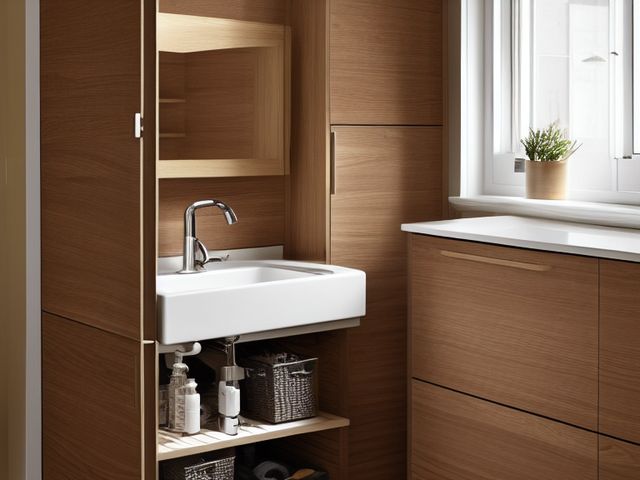
The under-sink cabinet, in the Primary Bathroom. To store cleaning supplies and backstock around the plumbing without ever hiding a leak. Two pull-out bins clear of the P-trap, a pale tray on the cabinet floor with nothing stacked on it, one open bottle per job, and both shut-off valves in plain sight when the doors swing open.
One session: 60-90 min, most of it in Straighten, fitting bins around the pipework.
The short version
- Sort. Take it all out and line it up on the floor by job: glass
- Straighten. Build the bins around the P-trap instead of fighting it, keeping the joint
- Shine. Wipe the cabinet floor and look hard for a dark ring
- Safety. Never store bleach where it can tip into an ammonia-based cleaner
- Standardize. One open container per job, backstock capped at two
- Sustain. Every hand soap refill is a leak check: crouch
Each step in full, with what to have on hand and what done looks like, below.
Where it is
Primary Bathroom
7 micro zones, one session each
- 1The Vanity Counter
- 2The Vanity Drawers
- 3The Under-Sink Cabinet
- 4The Medicine Cabinet
- 5The Shower or Tub
- 6The Toilet Area
- 7The Linen and Towel Storage
What done looks like
To store cleaning supplies and backstock around the plumbing without ever hiding a leak.
- Two pull-out bins clear of the P-trap
- A pale tray on the cabinet floor with nothing stacked on it
- One open bottle per job, and both shut-off valves in plain sight when the doors swing open
What done looks like
Two pull-out bins clear of the P-trap, a pale tray on the cabinet floor with nothing stacked on it, one open bottle per job, and both shut-off valves in plain sight when the doors swing open.
Common items here
- Cleaning supplies
- One open bottle per job
- Backstock, capped at two
- A pale tray on the cabinet floor
Check these before you start
- Poison, choke, or strangleBleach, drain opener, and bowl cleaner sitting at a crawling child's eye level behind one unlatched door. Fit a catch or move them above the sink line.
- Water and electricityA drip at the trap creeping toward a socket or a plugged-in nightlight on the wall behind the cabinet. Find it, and fix it now.
- Fall, cut, or crushA heavy bulk jug stacked on top of a pull-out bin, ready to come down on your hand when you slide the bin out. Heavy goes on the cabinet floor beside the tray, never above it.
Which of these is true here?
Match what you are actually seeing in the under-sink cabinet to why it keeps happening, then start at the pass that fixes that, not the top of the list.
I find several half-used bottles of the same cleaner
- We buy another when we cannot see the one we have. Confirm in 30 seconds: Open the door and, without moving anything, name what is at the back. If you cannot, that stock is invisible. If that checks out, start at Straighten.
- There is no rule that one is open at a time. Confirm in 30 seconds: Ask two people in the house to describe this zone when it is finished. Two different answers means there is no standard to keep. If that checks out, start at Standardize.
- They are bought on offer regardless of what is here. Confirm in 30 seconds: Find the last one of something you use daily. If nothing tells you it is the last one, you will find out at the worst possible moment. If that checks out, start at Standardize.
Something under here got damaged and nobody noticed
- The cabinet floor is dark and things sit directly on it. Confirm in 30 seconds: Open the door and, without moving anything, name what is at the back. If you cannot, that stock is invisible. If that checks out, start at Straighten.
- Boxes were stacked on top of the tray. Confirm in 30 seconds: Fetch it once and count the movements. More than two and the storage is charging you rent every time. If that checks out, start at Straighten.
- Nothing prompts us to look in here between cleans. Confirm in 30 seconds: Name the moment it happens. If the answer is "when I get round to it", there is no trigger and it will not survive a bad week. If that checks out, start at Sustain.
I cannot tell whether anything down there is leaking
- There is no pale tray to show a drip against. Confirm in 30 seconds: Open the door and, without moving anything, name what is at the back. If you cannot, that stock is invisible. If that checks out, start at Straighten.
- Bins and boxes sit over the P-trap. Confirm in 30 seconds: Have the shortest person who uses this zone fetch what they need daily. If they climb, reach overhead, or ask for help, the height is wrong. If that checks out, start at Safety.
- The shut-off valves are behind stored things. Confirm in 30 seconds: Look for the four: a blade your hand would meet, weight above shoulder height, heat beside something that burns, and an unsafe placement near a child's reach. If that checks out, start at Safety.
Only have 15 minutes? Pull everything out, wipe the cabinet floor dry, put a pale tray down bare, and return only two bins that clear the P-trap with one open bottle per job. Victory: Both shut-off valves are in plain sight when the doors swing open, and nothing is stacked on the tray.
The six passes, in order
Work them in this order. Sorting after you have arranged things means arranging things you were about to remove.
This zone's full kit list is below, after the method. Skim it first if you would rather gather everything before you start.
Sort
Decide what stays. Everything else leaves the zone now.
Take it all out and line it up on the floor by job: glass, tub and tile, toilet, drain, polish. You will find three half-full bottles of the same thing and one you cannot identify, and the one you cannot identify goes.
What to store it in, now that you know what you are keeping
Bins and shelves are for what Sort left behind, not a stand-in for it. Buying storage before sorting means buying a container for things you have not yet decided to keep.
Only if it applies to the under-sink cabinet: 5 more
Not every home needs these for the under-sink cabinet. Each one is here because some do, and the reason is next to it.
- Turntable 10-12 Inch Make deep-corner items accessible, in the Straighten, Standardize and Sustain passes. Do not overload; anchor wall-mounted or tall systems where required.
- Single-Tier Slide-Out Organizer Provide pull-out access in low or narrow cabinets, in the Straighten, Standardize and Sustain passes. Do not overload; anchor wall-mounted or tall systems where required.
- Two-Tier Slide-Out Organizer Create accessible pull-out storage in cabinets, in the Straighten, Standardize and Sustain passes. Do not overload; anchor wall-mounted or tall systems where required.
- Leak Tray Protect cabinets and expose plumbing leaks, in the Straighten, Standardize and Sustain passes. Do not overload; anchor wall-mounted or tall systems where required.
- Small Clear Lidded Bin ×4 Contain small loose items with visibility, in the Straighten, Standardize and Sustain passes. Do not overload; anchor wall-mounted or tall systems where required.
Straighten
Give what stays a home, placed where the hand actually reaches.
Build the bins around the P-trap instead of fighting it, keeping the joint and the valves visible. Paper goods and bulk toiletries take the side with headroom, and sprays sit at the front where you can read a label without kneeling.
Shine
Clean it, and use the cleaning to inspect what you cannot see when it is full.
Wipe the cabinet floor and look hard for a dark ring or a soft patch in the board, which is what a slow leak looks like before it looks like water. Wipe the neck of every bottle before it goes back so the pale tray never turns sticky.
Surface by surface, all 6 of them, with what to use on each.
Safety
Make the zone safe for everybody who uses it, including the shortest person.
Never store bleach where it can tip into an ammonia-based cleaner, and never decant anything into a drink bottle. This cabinet sits at toddler height, so if small children come through the house, fit a magnetic catch or move the chemistry above the sink line.
Standardize
Write down the best way you know today, so it survives you forgetting.
One open container per job, backstock capped at two. Label the front edge of each bin with the job rather than the brand, so the bowl cleaner cannot quietly end up among the glass sprays.
Sustain
Attach the reset to something that already happens, so it keeps itself.
Every hand soap refill is a leak check: crouch, run your eyes over the cabinet floor and the trap joint, then close the doors. Ten seconds, by whoever refilled the soap. Slip is anything stacked on the pale tray or standing where it hides the trap, because the tray only works if it can show you a drip you were not expecting. Recovery is giving the migrant back to its own bin. This cabinet is the one place where the reason for the standard stays invisible until the moment it becomes a floor.
The kit this zone called for
Everything above assumed you had these already. Types of thing, not brands: anything you already own that does the job is the right one to use.
- Bathroom grime and soap-film cleaner Shine Never mix cleaners; verify stone compatibility.
- Color-coded microfiber cloth set ×12 Shine Wash by use color; avoid fabric softener.
- Neutral pH multi-surface cleaner Shine, Sustain Verify surface compatibility; lock around children and pets.
- Compact vacuum with attachments Shine Use appropriate attachment.
- Keep, Relocate, Donate, Recycle, Trash container set ×5 Sort Do not block exits.
- Portable cleaning caddy Straighten, Shine, Sustain Secure chemicals from children and pets.
- Portable label maker Standardize, Sustain Follow surface and adhesive guidance.
- Removable write-on labels Standardize Test on delicate finishes.
Only if it applies to the under-sink cabinet: 3 more
- Small detail brush set Shine Use surface-safe bristles.
- Anti-tip anchors and hardware Safety Install to manufacturer and wall-type requirements.
- Shelf Location Label Set Standardize, Sustain Install and use according to product instructions.
The pipe you cannot see
You have packed this cabinet wall to wall because it is the only storage in the room, and the P-trap is now buried behind a tower of paper towels. Here is the arithmetic you have been avoiding: a joint that weeps unnoticed for months turns a cheap washer into a rotted cabinet base and a floor that has to come up. The rule: the trap joint and both shut-off valves stay visible whenever the doors are open, and nothing sits on the tray. If that means the backstock will not fit, the backstock leaves this room, not the sightline. Spare shampoo and toilet rolls can live in a linen cupboard. A leak cannot live anywhere else.
Cleaning it properly, surface by surface
This is the one cabinet you clean partly to read the plumbing. Empty it, wipe the floor board, and look hard at what the pipes have been doing while the doors were shut.
Work down, not across. Whatever comes off a high surface lands on the one below it, so cleaning the floor first means cleaning it twice.
Carry these in with you. Neutral pH multi-surface cleaner; Bathroom grime and soap-film cleaner; Small detail brush set; Color-coded microfiber cloth set; Compact vacuum with attachments; Portable cleaning caddy.
- The P-trap and the pipe joints
Wipe the trap and each joint with a dry cloth, then run a clean dry finger around the underside of every connection, since a wet finger tells you about a seep before a puddle ever will. - The shut-off valves
Wipe the valve body and the stem with a barely-damp cloth, then take the detail brush to the threads and the handle where grime cakes, so each valve stays clean and easy to read at a glance. - The pull-out bins
Slide the bins right out, tip any grit, and wash them in the sink with the soap-film cleaner, drying them before they slide back clear of the trap. - The pale drip tray on the cabinet floor
Lift the tray out and rinse it, and wipe the neck and cap of every bottle before it returns so the tray never turns sticky and keeps showing a fresh drip against the pale surface. - The cabinet floor board and back wall
Wipe the bare floor board and the back and side walls with a neutral pH cloth, working into the corners and along the wall behind the trap where damp gathers first. - The door interiors and hinges
Wipe the inside of both doors and the hinges, and clear any splash line along the bottom door edge with the detail brush.
How to clean anything else in the house, surface by surface.
Inspect as you clean. Cleaning is the only time you see the zone empty, so use it.
- A dark ring or a soft, spongy patch in the floor board, which is a slow leak showing itself before it shows as water.
- A green or white crust building on a pipe joint or a valve stem, the fingerprint of a mineral seep.
- A drip tray or bin base that has warped or cupped, meaning liquid has been pooling under it.
- Rust bleeding from a can base or a bracket, and mold blooming in the back corner.
- A valve that will not turn, or a supply line that feels stiff and cracked where it bends.
The standard that keeps it fixed
The P-trap and both shut-off valves stay in plain sight, one open bottle per job, backstock capped at two.
Reset trigger. Every hand soap refill. Crouch, check the cabinet floor, then close the doors.
How much the under-sink cabinet can actually hold
Two pull-out bins that both clear the P-trap, one open bottle per job, and a pale tray on the cabinet floor carrying nothing stacked on it, with both shut-off valves visible when the doors swing open.
If a bin has to straddle the P-trap, or a valve is hidden behind anything when the doors open, the cabinet is storing more than its plumbing leaves room for. Backstock moves out before bins get bigger: this cupboard's first job is showing you a leak on the day it starts. Run the honest count.
When this does not describe your under-sink cabinet
The passes above describe the ordinary case. Plenty of real households are not ordinary, and the fix is not to skip the method, it is to run it against a different starting shape.
- A vanity with a solid floor and no visible plumbing
- The pale tray still goes in. A solid floor hides a slow leak for longer, not less time, so the tray is doing more work here than in a cabinet where you would see the drip. Keep one bin rather than two if the opening is narrow.
- Child locks on the doors
- Keep the one-open-bottle rule and move anything corrosive to the highest shelf in the room instead. A lock is a delay, not a barrier, and the safety standard for this zone is what is reachable, not what is latched.
The rest of the primary bathroom
Each of these is one session on its own.
- The Vanity Counter
- The Vanity Drawers
- The Under-Sink Cabinet, you are here
- The Medicine Cabinet
- The Shower or Tub
- The Toilet Area
- The Linen and Towel Storage
The Primary Bathroom in full, with what each of the 7 zones is for
The primary bathroom as a deck of 76 cards: the frictions people report in each zone, the root cause behind each one, and the timed action that clears it. Free to read or print.
Zones that do the same job, elsewhere in the house
Different room, different name, same real job. Each one is its own page because the room around it changes what actually works.
- The Sink and Dishwashing Zone in the kitchen
- The Vanity Counter in the primary bathroom
- The Guest Vanity Counter in the guest bathroom
- The Guest Vanity Storage in the guest bathroom
Related reading
- Found a duplicate of something in this zone?
- Does this zone keep running out of something?
- Is the everyday item in this zone actually the easy one to reach?
- Moving three things to get to the one you need?
- This zone's safety pass, in full
Questions people ask about this zone
- How long does it take to reset the under-sink cabinet?
- One session: 60-90 min, most of it in Straighten, fitting bins around the pipework.
- What does a finished under-sink cabinet look like?
- Two pull-out bins clear of the P-trap, a pale tray on the cabinet floor with nothing stacked on it, one open bottle per job, and both shut-off valves in plain sight when the doors swing open.
- What is the hardest call to make in the under-sink cabinet?
- You have packed this cabinet wall to wall because it is the only storage in the room, and the P-trap is now buried behind a tower of paper towels. Here is the arithmetic you have been avoiding: a joint that weeps unnoticed for months turns a cheap washer into a rotted cabinet base and a floor that has to come up. The rule: the trap joint and both shut-off valves stay visible whenever the doors are open, and nothing sits on the tray. If that means the backstock will not fit, the backstock leaves this room, not the sightline. Spare shampoo and toilet rolls can live in a linen cupboard. A leak cannot live anywhere else.
- How do you keep the under-sink cabinet from getting cluttered again?
- The P-trap and both shut-off valves stay in plain sight, one open bottle per job, backstock capped at two. Every hand soap refill. Crouch, check the cabinet floor, then close the doors.
- What do you need to clean the under-sink cabinet?
- Neutral pH multi-surface cleaner; Bathroom grime and soap-film cleaner; Small detail brush set; Color-coded microfiber cloth set; Compact vacuum with attachments; Portable cleaning caddy.
- What do you clean first in the under-sink cabinet?
- The P-trap and the pipe joints. Wipe the trap and each joint with a dry cloth, then run a clean dry finger around the underside of every connection, since a wet finger tells you about a seep before a puddle ever will.
- Is there a poison, choke, or strangle risk in the under-sink cabinet?
- Bleach, drain opener, and bowl cleaner sitting at a crawling child's eye level behind one unlatched door. Fit a catch or move them above the sink line.
- Is there a water and electricity risk in the under-sink cabinet?
- A drip at the trap creeping toward a socket or a plugged-in nightlight on the wall behind the cabinet. Find it, and fix it now.
- Is there a fall, cut, or crush risk in the under-sink cabinet?
- A heavy bulk jug stacked on top of a pull-out bin, ready to come down on your hand when you slide the bin out. Heavy goes on the cabinet floor beside the tray, never above it.
- Why does the under-sink cabinet do this: I find several half-used bottles of the same cleaner?
- We buy another when we cannot see the one we have, so start at Straighten; There is no rule that one is open at a time, so start at Standardize; They are bought on offer regardless of what is here, so start at Standardize.
- Why does the under-sink cabinet do this: Something under here got damaged and nobody noticed?
- The cabinet floor is dark and things sit directly on it, so start at Straighten; Boxes were stacked on top of the tray, so start at Straighten; Nothing prompts us to look in here between cleans, so start at Sustain.
- Why does the under-sink cabinet do this: I cannot tell whether anything down there is leaking?
- There is no pale tray to show a drip against, so start at Straighten; Bins and boxes sit over the P-trap, so start at Safety; The shut-off valves are behind stored things, so start at Safety.
When you want it off the screen
Carry The Under-Sink Cabinet into the room
The method above is complete and free. The Whole House Print Pack puts The Under-Sink Cabinet and the other 113 micro zones on 684 printable cards, so the steps you just read are not stuck behind a phone screen while your hands are full.
The Print Pack, 19 dollarsJust this zone, 4 dollarsOr draw a card free
The Under-Sink Cabinet on its own is 4 dollars for 6 cards. All 114 micro zones is 19 dollars for 684. The whole house is the better buy; the single zone is here so you can take only what you are working on.
If The Under-Sink Cabinet keeps fighting back, the real problem usually sits somewhere else in the room. A one hour virtual consult is 250 dollars: we find the function, the friction and the root cause together, and you keep a written standard for the space.
See what a consult covers, 250 dollars
Not ready to pay for that either? Ask which zone first, free