Garage micro zone
The Lawn and Garden Tool Zone
The garden tool storage, in the Garage. Stores the yard tools and outdoor supplies so long handles stay off the floor and garden chemicals stay latched away from everything else. Every long-handled tool hanging head-up on the rail with nothing leaning in a corner, the hose coiled on its reel beside the door it goes out of, and all garden chemicals in their original labeled containers behind a latch above head height.
One session: 60-90 min, most of it in Sort and Safety, because the chemical shelf needs its own careful pass.
The short version
- Sort. Out go the rake with three tines left, the hose
- Straighten. Long handles hang head-up on a rail
- Shine. Scrape caked soil off the spade and hoe blades, wipe them with an oily rag
- Safety. Garden chemicals stay in their original labeled containers on a latched shelf above child
- Standardize. A painted or taped strip on the wall behind each long handle
- Sustain. The mower needs to cool before it goes away anyway
Each step in full, with what to have on hand and what done looks like, below.
Where it is
Garage
7 micro zones, one session each
- 1The Primary Workbench
- 2The Hand Tool Wall and Cabinets
- 3The Power Tool and Battery Zone
- 4The Automotive Care Zone
- 5The Sports and Recreation Zone
- 6The Lawn and Garden Tool Zone
- 7The Bulk and Overhead Storage
What done looks like
Stores the yard tools and outdoor supplies so long handles stay off the floor and garden chemicals stay latched away from everything else.
- Every long-handled tool hanging head-up on the rail with nothing leaning in a corner
- The hose coiled on its reel beside the door it goes out of
- All garden chemicals in their original labeled containers behind a latch above head height
What done looks like
Every long-handled tool hanging head-up on the rail with nothing leaning in a corner, the hose coiled on its reel beside the door it goes out of, and all garden chemicals in their original labeled containers behind a latch above head height.
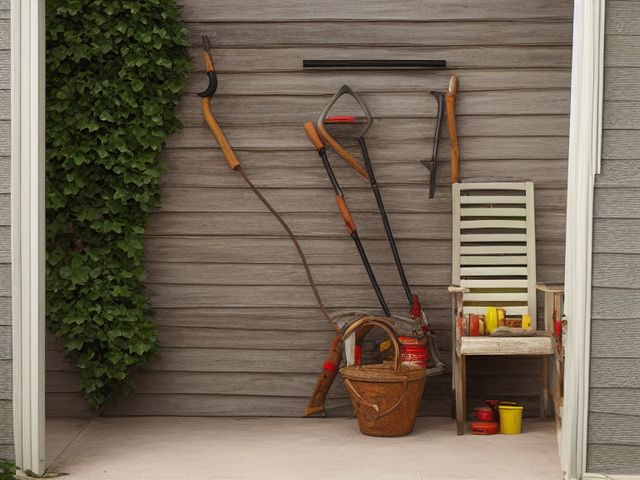
Common items here
- Long-handled tools, hanging head-up
- The hose, coiled on its reel
- Garden chemicals, latched above head height
Check these before you start
- Poison, choke, or strangleConcentrated weed killer decanted into an unlabeled bottle, and slug pellets or granular feed left where a dog can reach and will eat them.
- Fall, cut, or crushRakes and forks standing loose in a corner waiting to be stepped on or to topple handle-first, and unguarded hedge shear blades on an open shelf.
- Burn or fireThe mower's petrol can sharing a shelf with fertiliser, which is an oxidiser and should never sit next to fuel.
Which of these is true here?
Match what you are actually seeing in the garden tool storage to why it keeps happening, then start at the pass that fixes that, not the top of the list.
Long-handled tools live leaning in a corner
- There are more handles than there are hooks on the rail. Confirm in 30 seconds: Put back only what belongs here. If it still will not close, or still stacks four deep, the capacity is the problem, not the habit. If that checks out, start at Sort.
- There is no rail, so leaning is the only option. Confirm in 30 seconds: Ask where one specific item lives. If two people answer differently, or nobody answers, it has no home. If that checks out, start at Straighten.
- The rail is too high for the person who puts them away. Confirm in 30 seconds: Have the shortest person who uses this zone fetch what they need daily. If they climb, reach overhead, or ask for help, the height is wrong. If that checks out, start at Safety.
The hose is a tangle on the floor, or it leaks
- It is coiled by hand on the slab instead of onto a reel. Confirm in 30 seconds: Ask two people in the house to describe this zone when it is finished. Two different answers means there is no standard to keep. If that checks out, start at Standardize.
- The reel is not beside the door the hose goes out of. Confirm in 30 seconds: Stand where you use it and count the steps to where it is kept. More than two is the wrong cabinet. If that checks out, start at Straighten.
- It is left connected and pressurised through a frost. Confirm in 30 seconds: Name the moment it happens. If the answer is "when I get round to it", there is no trigger and it will not survive a bad week. If that checks out, start at Sustain.
I cannot tell what is in some of these containers
- Something was decanted out of its original container. Confirm in 30 seconds: Ask two people in the house to describe this zone when it is finished. Two different answers means there is no standard to keep. If that checks out, start at Standardize.
- The label has weathered off and nobody rewrote it. Confirm in 30 seconds: Open the door and, without moving anything, name what is at the back. If you cannot, that stock is invisible. If that checks out, start at Straighten.
- Nobody knows who bought it or what it was for. Confirm in 30 seconds: Ask who resets this zone. If the honest answer is "whoever gets to it" or two names with no agreement, there is no owner. If that checks out, start at Sustain.
A child or a pet could reach the garden chemicals
- They sit on an open shelf at or below head height. Confirm in 30 seconds: Look for the four: a blade your hand would meet, weight above shoulder height, heat beside something that burns, and an unsafe placement near a child's reach. If that checks out, start at Safety.
- There is nowhere latched to put them, so they stay on the open shelf. Confirm in 30 seconds: Ask where one specific item lives. If two people answer differently, or nobody answers, it has no home. If that checks out, start at Straighten.
- Empty containers wait in an open bin where they look like toys. Confirm in 30 seconds: Stand where you use it and count the steps to where it is kept. More than two is the wrong cabinet. If that checks out, start at Straighten.
Only have 15 minutes? Hang every long handle head-up on the rail, coil the hose onto its reel beside the door it goes out of, and move every garden chemical into a latched cupboard above head height, binning anything whose label you cannot read. Victory: Nothing leaning in a corner, a hose on its reel by the right door, and every chemical labeled, latched and above head height.
The six passes, in order
Work them in this order. Sorting after you have arranged things means arranging things you were about to remove.
This zone's full kit list is below, after the method. Skim it first if you would rather gather everything before you start.
Sort
Decide what stays. Everything else leaves the zone now.
Out go the rake with three tines left, the hose with the split you have meant to patch for two summers, and the cracked nursery pots kept for seedlings you never started. Count your spades honestly, because most garages hold four and dig with one.
What to store it in, now that you know what you are keeping
Bins and shelves are for what Sort left behind, not a stand-in for it. Buying storage before sorting means buying a container for things you have not yet decided to keep.
Only if it applies to the garden tool storage: 2 more
Not every home needs these for the garden tool storage. Each one is here because some do, and the reason is next to it.
- Garden Tool Caddy Contain small garden tools and supplies, in the Straighten, Standardize and Sustain passes. Do not overload; anchor wall-mounted or tall systems where required.
- Hose Reel Control garden hose and protect walkways, in the Straighten, Standardize and Sustain passes. Do not overload; anchor wall-mounted or tall systems where required.
Straighten
Give what stays a home, placed where the hand actually reaches.
Long handles hang head-up on a rail so no fork stands loose in a corner waiting to be trodden on. The hose lives on a reel beside the door it goes out of, not coiled on the slab. Fertiliser, weed killer, and seed share one shelf with a lip on it, well away from the cooler and anything else that touches food or skin.
Shine
Clean it, and use the cleaning to inspect what you cannot see when it is full.
Scrape caked soil off the spade and hoe blades, wipe them with an oily rag, and run a file along the spade edge so it bites next time. Empty and rinse the spreader hopper, because leftover fertiliser eats the metal from the inside out over a winter.
Surface by surface, all 7 of them, with what to use on each.
Safety
Make the zone safe for everybody who uses it, including the shortest person.
Garden chemicals stay in their original labeled containers on a latched shelf above child and pet height, never decanted into a drink bottle. String trimmers and hedge shears go up with guards fitted and cutting ends pointing away from the aisle you walk down.
Standardize
Write down the best way you know today, so it survives you forgetting.
A painted or taped strip on the wall behind each long handle, so a bare strip is a question you answer before you close the door. One sign on the chemical shelf reading "garden chemicals only, nothing else on this shelf."
Sustain
Attach the reset to something that already happens, so it keeps itself.
The mower needs to cool before it goes away anyway, and that is the window when the spade gets scraped, wiped and hung back on its strip, by whoever cut the grass. Slip is a bare taped strip, or any long handle leaning in a corner, both read from the doorway. Recovery is scrape, wipe, hang, about a minute a tool. Wet is what this zone cannot absorb. A muddy tool has a legitimate reason not to go straight onto the wall, and that reason is how a spade rusts solid by spring.
The kit this zone called for
Everything above assumed you had these already. Types of thing, not brands: anything you already own that does the job is the right one to use.
- Wire brush and scraper set Shine Wear eye protection; flying rust and grit is the reason this is a safety-glasses job.
- Light machine oil Shine, Sustain Keep off skin and away from heat; dispose of oiled rags in a closed metal can, never balled in an open bin.
- Push broom Shine, Sustain Hang head-up on a rail; bristles resting on concrete splay and re-soil the floor they touch.
- Impact-rated safety glasses Safety Use rated protection appropriate to task.
- Color-coded microfiber cloth set ×12 Shine Wash by use color; avoid fabric softener.
- Neutral pH multi-surface cleaner Shine, Sustain Verify surface compatibility; lock around children and pets.
- Compact vacuum with attachments Shine Use appropriate attachment.
- Keep, Relocate, Donate, Recycle, Trash container set ×5 Sort Do not block exits.
- Portable cleaning caddy Straighten, Shine, Sustain Secure chemicals from children and pets.
- Portable label maker Standardize, Sustain Follow surface and adhesive guidance.
- Removable write-on labels Standardize Test on delicate finishes.
Only if it applies to the garden tool storage: 5 more
- Reusable or disposable nitrile gloves Shine, Safety Use per product label.
- Floor Boundary Tape Safety, Standardize Install and use according to product instructions.
- Floor-material-compatible cleaner Shine, Sustain Match cleaner to floor material.
- Stable household step stool Safety Use on level surfaces only.
- Moisture Absorber or Humidity Monitor Safety, Sustain Install and use according to product instructions.
The half-used chemicals
The shelf holds a bag of feed with the top rolled over, a jug of concentrate that moved here from your last house, and something in an unlabeled sprayer that you are fairly confident is weed killer. Start with the unlabeled one, because it is the easy call: you cannot safely use what you cannot name, so it goes to hazardous waste this month without being opened again. For the rest, apply one season of intent. If you will not genuinely use it before the next growing season ends, you are storing a poison above your children's heads for no reason. Take it to a hazardous waste day, or offer it to a neighbor in its own labeled container. Never pour any of it down a drain, into a gutter, or onto the ground behind the shed.
Cleaning it properly, surface by surface
Scrape, oil, and sharpen the blades as they come off the rail, and rinse the spreader before old feed eats it from the inside out. The chemicals stay latched and above head height the whole time you work around them.
Work down, not across. Whatever comes off a high surface lands on the one below it, so cleaning the floor first means cleaning it twice.
Carry these in with you. Compact vacuum with attachments; Neutral pH multi-surface cleaner; Floor-material-compatible cleaner; Color-coded microfiber cloth set; Wire brush or scraper; Light machine oil; Flat file; Garden hose.
- The tool rail and the long-handled tools
Wipe the rail and the wall behind it high up first, then lift each spade, rake, and hoe down to clean it, so nothing rests handle-first in a corner. - The spade and hoe blades
Scrape the caked soil off each blade with a wire brush or scraper, wipe the metal with an oiled rag, and run a flat file along the cutting edge so it bites next time before it goes back head-up on the rail. - The hose and its reel
Wipe the reel, coil the hose back onto it evenly, and rinse any dried soil out of the nozzle. - The spreader hopper
Empty the hopper completely, rinse it out with the hose, and dry it, because leftover fertiliser eats the metal from the inside over a winter. - The string trimmer and hedge shears
Wipe the cutting heads down, clear grass from the guards, and hang them with the cutting ends pointing away from the aisle you walk. - The latched chemical shelf
Wipe the shelf front and the outside of each container while the shelf stays latched and above head height, reading every label as you go. - The aisle floor
Sweep the aisle, then mop it with the floor-material-compatible cleaner so soil and spilled feed do not get tracked around the garage.
How to clean anything else in the house, surface by surface.
Inspect as you clean. Cleaning is the only time you see the zone empty, so use it.
- Rust pitting along a spade or shear edge, and a handle splitting or working loose where the head meets the shaft.
- Fertiliser crust eating the inside of the spreader hopper into flaking metal.
- A garden chemical container that is weeping, crusted, or swollen on the latched shelf, flagged without decanting or handling it further.
- A perished hose washer or a split fitting dripping at the reel.
The standard that keeps it fixed
Every long tool hangs on its taped strip, and nothing but garden chemicals lives on the latched shelf.
Reset trigger. While the mower is cooling after a cut, that is when the blades get scraped, wiped, and hung.
How much the garden tool storage can actually hold
Every long-handled tool hanging head-up on the rail with nothing leaning in a corner, the hose coiled on its reel beside the door it goes out of, and all garden chemicals in their original labeled containers behind a latch above head height.
The rail is the capacity: one hook, one handle, and a tool with no hook leans in a corner until it falls on somebody. The chemicals are not a capacity question at all. Original container, legible label, latched, above head height, or it leaves the house, because a decanted weedkiller in an unmarked bottle is the single most dangerous object most garages hold. Run the honest count.
When this does not describe your garden tool storage
The passes above describe the ordinary case. Plenty of real households are not ordinary, and the fix is not to skip the method, it is to run it against a different starting shape.
- A small yard, a balcony, or no lawn at all
- Most of this zone should not exist. A trowel, a pair of secateurs, a watering can and one bag of compost is a complete kit, and the rail can be two hooks. Storing a full-size lawn kit for a lawn you do not have is how a garage loses a parking bay.
- Children, or a dog that goes in the garden
- The latch and the height stop being a preference. Anything granular, powdered or concentrated goes above head height behind a latch, and the empty containers leave the same day rather than waiting in the bin where they are just as reachable and look like toys.
The rest of the garage
Each of these is one session on its own.
- The Primary Workbench
- The Hand Tool Wall and Cabinets
- The Power Tool and Battery Zone
- The Automotive Care Zone
- The Sports and Recreation Zone
- The Lawn and Garden Tool Zone, you are here
- The Bulk and Overhead Storage
The Garage in full, with what each of the 7 zones is for
The garage as a deck of 80 cards: the frictions people report in each zone, the root cause behind each one, and the timed action that clears it. Free to read or print.
Zones that do the same job, elsewhere in the house
Different room, different name, same real job. Each one is its own page because the room around it changes what actually works.
Related reading
- Still does not fit, even after the honest count?
- Is the everyday item in this zone actually the easy one to reach?
- Does everyone in the house agree what "done" looks like here?
- Does something in this zone actually get used somewhere else?
- Found a duplicate of something in this zone?
Questions people ask about this zone
- How long does it take to reset the garden tool storage?
- One session: 60-90 min, most of it in Sort and Safety, because the chemical shelf needs its own careful pass.
- What does a finished garden tool storage look like?
- Every long-handled tool hanging head-up on the rail with nothing leaning in a corner, the hose coiled on its reel beside the door it goes out of, and all garden chemicals in their original labeled containers behind a latch above head height.
- What is the hardest call to make in the garden tool storage?
- The shelf holds a bag of feed with the top rolled over, a jug of concentrate that moved here from your last house, and something in an unlabeled sprayer that you are fairly confident is weed killer. Start with the unlabeled one, because it is the easy call: you cannot safely use what you cannot name, so it goes to hazardous waste this month without being opened again. For the rest, apply one season of intent. If you will not genuinely use it before the next growing season ends, you are storing a poison above your children's heads for no reason. Take it to a hazardous waste day, or offer it to a neighbor in its own labeled container. Never pour any of it down a drain, into a gutter, or onto the ground behind the shed.
- How do you keep the garden tool storage from getting cluttered again?
- Every long tool hangs on its taped strip, and nothing but garden chemicals lives on the latched shelf. While the mower is cooling after a cut, that is when the blades get scraped, wiped, and hung.
- What do you need to clean the garden tool storage?
- Compact vacuum with attachments; Neutral pH multi-surface cleaner; Floor-material-compatible cleaner; Color-coded microfiber cloth set; Wire brush or scraper; Light machine oil; Flat file; Garden hose.
- What do you clean first in the garden tool storage?
- The tool rail and the long-handled tools. Wipe the rail and the wall behind it high up first, then lift each spade, rake, and hoe down to clean it, so nothing rests handle-first in a corner.
- Is there a poison, choke, or strangle risk in the garden tool storage?
- Concentrated weed killer decanted into an unlabeled bottle, and slug pellets or granular feed left where a dog can reach and will eat them.
- Is there a fall, cut, or crush risk in the garden tool storage?
- Rakes and forks standing loose in a corner waiting to be stepped on or to topple handle-first, and unguarded hedge shear blades on an open shelf.
- Is there a burn or fire risk in the garden tool storage?
- The mower's petrol can sharing a shelf with fertiliser, which is an oxidiser and should never sit next to fuel.
- Why does the garden tool storage do this: Long-handled tools live leaning in a corner?
- There are more handles than there are hooks on the rail, so start at Sort; There is no rail, so leaning is the only option, so start at Straighten; The rail is too high for the person who puts them away, so start at Safety.
- Why does the garden tool storage do this: The hose is a tangle on the floor, or it leaks?
- It is coiled by hand on the slab instead of onto a reel, so start at Standardize; The reel is not beside the door the hose goes out of, so start at Straighten; It is left connected and pressurised through a frost, so start at Sustain.
- Why does the garden tool storage do this: I cannot tell what is in some of these containers?
- Something was decanted out of its original container, so start at Standardize; The label has weathered off and nobody rewrote it, so start at Straighten; Nobody knows who bought it or what it was for, so start at Sustain.
- Why does the garden tool storage do this: A child or a pet could reach the garden chemicals?
- They sit on an open shelf at or below head height, so start at Safety; There is nowhere latched to put them, so they stay on the open shelf, so start at Straighten; Empty containers wait in an open bin where they look like toys, so start at Straighten.
When you want it off the screen
Carry The Lawn and Garden Tool Zone into the room
The method above is complete and free. The Whole House Print Pack puts The Lawn and Garden Tool Zone and the other 113 micro zones on 684 printable cards, so the steps you just read are not stuck behind a phone screen while your hands are full.
The Print Pack, 19 dollarsJust this zone, 4 dollarsOr draw a card free
The Lawn and Garden Tool Zone on its own is 4 dollars for 6 cards. All 114 micro zones is 19 dollars for 684. The whole house is the better buy; the single zone is here so you can take only what you are working on.
If The Lawn and Garden Tool Zone keeps fighting back, the real problem usually sits somewhere else in the room. A one hour virtual consult is 250 dollars: we find the function, the friction and the root cause together, and you keep a written standard for the space.
See what a consult covers, 250 dollars
Not ready to pay for that either? Ask which zone first, free