Garage micro zone
The Primary Workbench
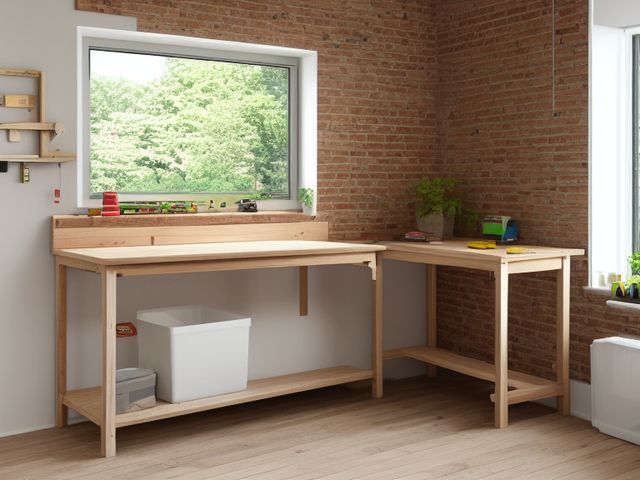
The workbench, in the Garage. The one surface in the house where things get fixed, glued, cut, and assembled. A bare bench top holding only the vise and the task light, one tray with the current job in it, clamps racked on the rail, and swept concrete visible under the bench.
One session: 60-90 min, most of it in Sort, because the bench top is buried under other zones' overflow.
The short version
- Sort. Clear the top down to bare wood
- Straighten. Give the vise its own corner
- Shine. Vacuum sawdust and metal filings out of the bench dog holes
- Safety. Check the bench outlet and the task light cord for nicks
- Standardize. Tape a photo of the cleared bench, vise and task light and nothing else
- Sustain. A project is not over when the glue sets
Each step in full, with what to have on hand and what done looks like, below.
Where it is
Garage
7 micro zones, one session each
- 1The Primary Workbench
- 2The Hand Tool Wall and Cabinets
- 3The Power Tool and Battery Zone
- 4The Automotive Care Zone
- 5The Sports and Recreation Zone
- 6The Lawn and Garden Tool Zone
- 7The Bulk and Overhead Storage
What done looks like
The one surface in the house where things get fixed, glued, cut, and assembled.
- A bare bench top holding only the vise and the task light
- One tray with the current job in it
- Clamps racked on the rail
- Swept concrete visible under the bench
What done looks like
A bare bench top holding only the vise and the task light, one tray with the current job in it, clamps racked on the rail, and swept concrete visible under the bench.
Common items here
- The vise
- The task light
- One tray for the current job
- Clamps, racked on the rail
Check these before you start
- Fall, cut, or crushChisels, utility knives, and handsaws loose in the bench drawer or lying edge-up on the top where you sweep with a bare hand.
- Burn or fireRags soaked with oil, stain, or solvent left balled in an open bin under the bench. They can heat on their own with no flame anywhere near them.
- Water and electricityThe bench outlet or a power strip sitting low on a slab that runs wet when a car comes in from the rain.
Which of these is true here?
Match what you are actually seeing in the workbench to why it keeps happening, then start at the pass that fixes that, not the top of the list.
The bench is never clear enough to start a job on
- Finished jobs are pushed aside rather than put away. Confirm in 30 seconds: Name the moment it happens. If the answer is "when I get round to it", there is no trigger and it will not survive a bad week. If that checks out, start at Sustain.
- It is the largest flat surface in the house, so everything gets parked on it. Confirm in 30 seconds: Ask where one specific item lives. If two people answer differently, or nobody answers, it has no home. If that checks out, start at Straighten.
- More than one job is part-done at the same time. Confirm in 30 seconds: Pick up one piece. If your first thought is a verb (pay, sign, call, decide) rather than a place, it needs a decision, not a home. If that checks out, start at Sort.
I spend longer finding the tool than doing the job
- Tools stay where they were last used instead of going back. Confirm in 30 seconds: Ask two people in the house to describe this zone when it is finished. Two different answers means there is no standard to keep. If that checks out, start at Standardize.
- The tools this bench needs are stored across the garage. Confirm in 30 seconds: Stand where you use it and count the steps to where it is kept. More than two is the wrong cabinet. If that checks out, start at Straighten.
- Two people use this bench and put things back differently. Confirm in 30 seconds: Do the shared task together, once. The argument that starts is the conflict, and it is a design problem, not a character problem. If that checks out, start at Standardize.
There is always something underfoot while I am working
- Offcuts and packaging go on the floor because there is no bin here. Confirm in 30 seconds: Ask where one specific item lives. If two people answer differently, or nobody answers, it has no home. If that checks out, start at Straighten.
- Extension cords run across the walking line to the nearest socket. Confirm in 30 seconds: Look for the four: a blade your hand would meet, weight above shoulder height, heat beside something that burns, and an unsafe placement near a child's reach. If that checks out, start at Safety.
- Boxes are stored under the bench where the broom should reach. Confirm in 30 seconds: Stand where you use it and count the steps to where it is kept. More than two is the wrong cabinet. If that checks out, start at Straighten.
Only have 15 minutes? Clear the bench top down to the vise and the task light, put the current job in one tray, rack the clamps on the rail, and sweep until you can see concrete under the bench. Victory: A bare bench, one tray holding one job, and swept concrete visible underneath.
The six passes, in order
Work them in this order. Sorting after you have arranged things means arranging things you were about to remove.
This zone's full kit list is below, after the method. Skim it first if you would rather gather everything before you start.
Sort
Decide what stays. Everything else leaves the zone now.
Clear the top down to bare wood. Every screw living in a jar lid, every glue bottle with a plugged nozzle, and every offcut you saved because the grain looked too good to bin gets a verdict before anything is allowed back up.
What to store it in, now that you know what you are keeping
Bins and shelves are for what Sort left behind, not a stand-in for it. Buying storage before sorting means buying a container for things you have not yet decided to keep.
Only if it applies to the workbench: 5 more
Not every home needs these for the workbench. Each one is here because some do, and the reason is next to it.
- Material Rack Store long project materials safely, in the Straighten, Standardize and Sustain passes. Do not overload; anchor wall-mounted or tall systems where required.
- Flammable Safety Cabinet Secure flammable finishes and solvents, in the Straighten, Standardize and Sustain passes. Do not overload; anchor wall-mounted or tall systems where required.
- PPE Wall Station Make protective equipment visible and ready, in the Straighten, Standardize and Sustain passes. Do not overload; anchor wall-mounted or tall systems where required.
- Garden Tool Caddy Contain small garden tools and supplies, in the Straighten, Standardize and Sustain passes. Do not overload; anchor wall-mounted or tall systems where required.
- Hose Reel Control garden hose and protect walkways, in the Straighten, Standardize and Sustain passes. Do not overload; anchor wall-mounted or tall systems where required.
Straighten
Give what stays a home, placed where the hand actually reaches.
Give the vise its own corner and keep a full arm's length of open top in front of it, because that is the space a long board swings through. Clamps go on the rail within reach and fasteners in the drawer directly beneath. The post that comes in, the half-tin of paint, and the parcel waiting to go back are not bench items and never were.
Shine
Clean it, and use the cleaning to inspect what you cannot see when it is full.
Vacuum sawdust and metal filings out of the bench dog holes and the seam where the top meets the back wall, then wipe the vise screw down and put a drop of oil on it.
Surface by surface, all 8 of them, with what to use on each.
Safety
Make the zone safe for everybody who uses it, including the shortest person.
Check the bench outlet and the task light cord for nicks, and confirm you can plug the sander in without a lead crossing the strip of floor you stand on. Chisels and utility blades never rest edge-up on the top, where a hand sweeps sawdust without looking.
Standardize
Write down the best way you know today, so it survives you forgetting.
Tape a photo of the cleared bench, vise and task light and nothing else, on the wall directly behind it at eye height. When you look up and see a paint tin or a coil of wire that the photo does not show, that is the next thing to leave.
Sustain
Attach the reset to something that already happens, so it keeps itself.
A project is not over when the glue sets. It is over when the clamps are back on the rail, the offcuts are in the scrap bin and the top is swept, all before the task light goes off. Pulling the last plug out of the bench outlet is the signal to sweep, not the clock on your phone. Ten minutes, by whoever ran the job. Slip is anything on the bench the photo behind it does not show. Projects here do not end, they pause, and after a fortnight a pause looks like abandonment.
The kit this zone called for
Everything above assumed you had these already. Types of thing, not brands: anything you already own that does the job is the right one to use.
- Self-closing oily rag can Safety, Sustain Oil-finish rags generate their own heat as they cure and can ignite with nothing touching them; the lid must fall shut on its own weight.
- Light machine oil Shine, Sustain Keep off skin and away from heat; dispose of oiled rags in a closed metal can, never balled in an open bin.
- Push broom Shine, Sustain Hang head-up on a rail; bristles resting on concrete splay and re-soil the floor they touch.
- Impact-rated safety glasses Safety Use rated protection appropriate to task.
- Color-coded microfiber cloth set ×12 Shine Wash by use color; avoid fabric softener.
- Neutral pH multi-surface cleaner Shine, Sustain Verify surface compatibility; lock around children and pets.
- Compact vacuum with attachments Shine Use appropriate attachment.
- Keep, Relocate, Donate, Recycle, Trash container set ×5 Sort Do not block exits.
- Portable cleaning caddy Straighten, Shine, Sustain Secure chemicals from children and pets.
- Portable label maker Standardize, Sustain Follow surface and adhesive guidance.
- Removable write-on labels Standardize Test on delicate finishes.
Only if it applies to the workbench: 2 more
- Water-resistant permanent labels Standardize, Sustain Avoid irreplaceable surfaces.
- Moisture Absorber or Humidity Monitor Safety, Sustain Install and use according to product instructions.
The project that has been there since spring
Name the half-finished thing sitting on your bench right now. It gets one of three verdicts today: a specific weekend written on it to finish it, a breakdown that returns the timber, hardware, and hinges to stock, or the skip. The rule that settles it is that anything which has sat untouched through one full season is not a project any more, it is furniture with your intentions stacked on top. Do not solve this by lifting it onto a shelf. That only moves the decision somewhere darker and costs you the bench in the meantime, which is the one surface the whole garage depends on.
Cleaning it properly, surface by surface
The workbench cleans top to bottom, back wall to slab. Clear the dust and filings out of the dog holes and the seam behind the top first, then oil the vise so the one surface you fix things on is genuinely ready to work.
Work down, not across. Whatever comes off a high surface lands on the one below it, so cleaning the floor first means cleaning it twice.
Carry these in with you. Compact vacuum with attachments; Color-coded microfiber cloth set; Neutral pH multi-surface cleaner; Small detail brush set; Portable cleaning caddy; Light machine oil.
- The pegboard and painted wall behind the bench
Start high and at the back. Run the vacuum brush along the top edge of the pegboard and down its face to pull off the film of sawdust before it drifts onto the clean top, then wipe the wall above with a barely damp microfibre cloth. - The task light and its cord run
Dust the shade and arm with a dry cloth, then draw a just-damp cloth down the cord to lift the greasy grit that collects on it. Leave the cloth dry around the fitting itself, never wet. - The bench outlet and power strip
Wipe the faceplate and the power strip housing with a dry cloth only, and work a dry brush around the socket surrounds to lift the sawdust that packs in. Keep every drop of moisture away from the sockets themselves. - The bench top and the seam where it meets the back wall
Vacuum the whole top first, working the crevice tool hard along the back seam where filings pack in. Then wipe the sealed top with the neutral pH cleaner, following the grain, and buff it dry so nothing is left to rust a tool set down on it. - The bench dog holes
Push the vacuum crevice nozzle into each dog hole to draw out sawdust and metal filings, or run a detail brush round the rim, since a packed hole stops a dog seating flush. - The vise
Wipe the jaws and body clean of grit, wind the vise fully open and closed, then lay a drop of light machine oil along the screw and slide and work it back and forth to carry the oil in. - The clamp rail and the current-job tray
Wipe each clamp bar as it goes back on the rail, then tip the job tray out, clear its corners, and wipe it before the parts return. - The bench drawer and the concrete under the bench
Pull the drawer right out, tip the grit from its back corners, and wipe both runners. Finish by sweeping and vacuuming the slab under the bench until bare concrete shows.
How to clean anything else in the house, surface by surface.
Inspect as you clean. Cleaning is the only time you see the zone empty, so use it.
- Rust blooming on the vise screw, the bench dogs, or any bare steel on the top, the first sign the bench is holding damp.
- A hairline crack or a soft spongy patch opening in the bench top or a leg joint, and any wobble when you lean your weight on it.
- A white salt bloom or a spreading damp patch on the slab under the bench, which says water is tracking in under the wall.
- Scorching, browning, or a warm smell at the bench outlet or along the light cord as your hand passes over it.
The standard that keeps it fixed
The bench ends every session bare except the vise and the task light.
Reset trigger. When you pull the last plug out of the bench outlet, that is the signal to sweep. The plug leaving the wall, not the clock on your phone.
How much the workbench can actually hold
A bare bench top holding only the vise and the task light, one tray with the current job in it, clamps racked on the rail, and swept concrete visible under the bench.
One tray, one job. A second tray is a second unfinished job, and two unfinished jobs on one bench is how a workbench quietly becomes a shelf that nothing gets fixed on. The floor is the other half of the test: if you cannot see swept concrete under the bench, the bench has already overflowed downwards and the top is only the part you can see. Run the honest count.
When this does not describe your workbench
The passes above describe the ordinary case. Plenty of real households are not ordinary, and the fix is not to skip the method, it is to run it against a different starting shape.
- The bench shares the garage with a parked car
- Every session has to end clear, because the space is borrowed rather than owned. A rolling cart that takes the current tray and the clamps and tucks against the wall makes that possible; a bench that cannot be ended is a bench that stays started.
- No fixed bench, only a portable workmate or a tailgate
- Then the tray is the zone, and the rule moves onto it: everything goes back in the tray at the end of the session, including the offcuts. Without a permanent surface, the tray is the only thing holding the standard.
The rest of the garage
Each of these is one session on its own.
- The Primary Workbench, you are here
- The Hand Tool Wall and Cabinets
- The Power Tool and Battery Zone
- The Automotive Care Zone
- The Sports and Recreation Zone
- The Lawn and Garden Tool Zone
- The Bulk and Overhead Storage
The Garage in full, with what each of the 7 zones is for
The garage as a deck of 80 cards: the frictions people report in each zone, the root cause behind each one, and the timed action that clears it. Free to read or print.
Zones that do the same job, elsewhere in the house
Different room, different name, same real job. Each one is its own page because the room around it changes what actually works.
Related reading
- Why the standard above names one home per category
- Why this zone gets messy again
- This zone's safety pass, in full
- Does everyone in the house agree what "done" looks like here?
- Is mail piling up on this exact surface?
Questions people ask about this zone
- How long does it take to reset the workbench?
- One session: 60-90 min, most of it in Sort, because the bench top is buried under other zones' overflow.
- What does a finished workbench look like?
- A bare bench top holding only the vise and the task light, one tray with the current job in it, clamps racked on the rail, and swept concrete visible under the bench.
- What is the hardest call to make in the workbench?
- Name the half-finished thing sitting on your bench right now. It gets one of three verdicts today: a specific weekend written on it to finish it, a breakdown that returns the timber, hardware, and hinges to stock, or the skip. The rule that settles it is that anything which has sat untouched through one full season is not a project any more, it is furniture with your intentions stacked on top. Do not solve this by lifting it onto a shelf. That only moves the decision somewhere darker and costs you the bench in the meantime, which is the one surface the whole garage depends on.
- How do you keep the workbench from getting cluttered again?
- The bench ends every session bare except the vise and the task light. When you pull the last plug out of the bench outlet, that is the signal to sweep. The plug leaving the wall, not the clock on your phone.
- What do you need to clean the workbench?
- Compact vacuum with attachments; Color-coded microfiber cloth set; Neutral pH multi-surface cleaner; Small detail brush set; Portable cleaning caddy; Light machine oil.
- What do you clean first in the workbench?
- The pegboard and painted wall behind the bench. Start high and at the back. Run the vacuum brush along the top edge of the pegboard and down its face to pull off the film of sawdust before it drifts onto the clean top, then wipe the wall above with a barely damp microfibre cloth.
- Is there a fall, cut, or crush risk in the workbench?
- Chisels, utility knives, and handsaws loose in the bench drawer or lying edge-up on the top where you sweep with a bare hand.
- Is there a burn or fire risk in the workbench?
- Rags soaked with oil, stain, or solvent left balled in an open bin under the bench. They can heat on their own with no flame anywhere near them.
- Is there a water and electricity risk in the workbench?
- The bench outlet or a power strip sitting low on a slab that runs wet when a car comes in from the rain.
- Why does the workbench do this: The bench is never clear enough to start a job on?
- Finished jobs are pushed aside rather than put away, so start at Sustain; It is the largest flat surface in the house, so everything gets parked on it, so start at Straighten; More than one job is part-done at the same time, so start at Sort.
- Why does the workbench do this: I spend longer finding the tool than doing the job?
- Tools stay where they were last used instead of going back, so start at Standardize; The tools this bench needs are stored across the garage, so start at Straighten; Two people use this bench and put things back differently, so start at Standardize.
- Why does the workbench do this: There is always something underfoot while I am working?
- Offcuts and packaging go on the floor because there is no bin here, so start at Straighten; Extension cords run across the walking line to the nearest socket, so start at Safety; Boxes are stored under the bench where the broom should reach, so start at Straighten.
When you want it off the screen
Carry The Primary Workbench into the room
The method above is complete and free. The Whole House Print Pack puts The Primary Workbench and the other 113 micro zones on 684 printable cards, so the steps you just read are not stuck behind a phone screen while your hands are full.
The Print Pack, 19 dollarsJust this zone, 4 dollarsOr draw a card free
The Primary Workbench on its own is 4 dollars for 6 cards. All 114 micro zones is 19 dollars for 684. The whole house is the better buy; the single zone is here so you can take only what you are working on.
If The Primary Workbench keeps fighting back, the real problem usually sits somewhere else in the room. A one hour virtual consult is 250 dollars: we find the function, the friction and the root cause together, and you keep a written standard for the space.
See what a consult covers, 250 dollars
Not ready to pay for that either? Ask which zone first, free