Family Room micro zone
The Craft and Activity Zone
The craft area, in the Family Room. Hold craft supplies grouped by activity so a project can start in one motion and the surface can be cleared for dinner just as fast. Four lidded, labeled bins (paper and card, drawing, glue and tape, kits in progress), scissors standing point down in a cup out of the youngest child's reach, one completely clear work surface, and exactly one project bin out on it.
One session: 45-75 min, most of it in Sort, testing every marker and opening every kit.
The short version
- Sort. Test every marker on a scrap of paper, because the cap tells you nothing
- Straighten. Pack the bins by what gets made, not by what the material is
- Shine. Scrape dried glue and paint off the work surface with a plastic scraper
- Safety. The glue gun is the real hazard here
- Standardize. One project out at a time
- Sustain. When the table is being set for dinner, the open project bin closes
Each step in full, with what to have on hand and what done looks like, below.
Where it is
Family Room
6 micro zones, one session each
- 1The Primary Media Zone
- 2The Toy and Play Zone
- 3The Board Game and Puzzle Zone
- 4The Blanket and Comfort Zone
- 5The Charging and Device Zone
- 6The Craft and Activity Zone
What done looks like
Hold craft supplies grouped by activity so a project can start in one motion and the surface can be cleared for dinner just as fast.
- Four lidded, labeled bins (paper and card, drawing, glue and tape, kits in progress)
- Scissors standing point down in a cup out of the youngest child's reach
- One completely clear work surface
- Exactly one project bin out on it
What done looks like
Four lidded, labeled bins (paper and card, drawing, glue and tape, kits in progress), scissors standing point down in a cup out of the youngest child's reach, one completely clear work surface, and exactly one project bin out on it.
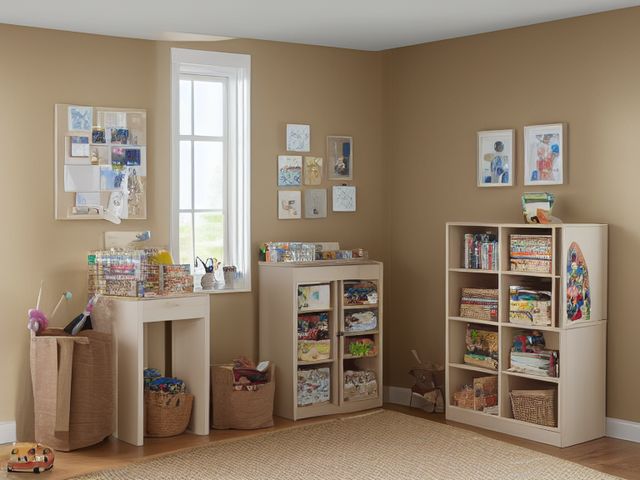
Common items here
- Four lidded, labeled bins
- Scissors, standing point down in a cup
- One project bin, out on the clear surface
What belongs, and what strays in
Belongs here:
- Four lidded, labeled bins: paper and card, drawing, glue and tape, kits in progress
- Scissors, standing point down in a cup, out of the youngest child's reach
- One completely clear work surface, with exactly one project bin out on it
Strays in and should leave:
- A marker that fails the scrap-paper test
- Dried glue sticks
- Paint that has separated and will not stir back together
- A kit whose instruction sheet is gone and cannot be found online
Check these before you start
- Burn or fireA glue gun left plugged in on the table after everyone walks away. The tip holds enough heat to burn a hand or scorch the surface long after the last bead of glue.
- Fall, cut, or crushCraft knives and sharp-point scissors stored blade up in a cup, or left flat on a work surface a child reaches across from the other side.
- Poison, choke, or strangleSeed beads, googly eyes, and pompoms live in the same open room as a crawling child, and craft glue and solvent based markers belong on a high shelf rather than in a floor-level bin.
Which of these is true here?
Match what you are actually seeing in the craft area to why it keeps happening, then start at the pass that fixes that, not the top of the list.
Seed beads and pompoms from the kits-in-progress bin are scattered on the floor this room shares with a crawling child, and finding the glue means opening three different bins
- Small beads on a floor a crawling child also uses are a choke hazard that overrides anything about the room's tidiness. Confirm in 30 seconds: Look for the four: a blade your hand would meet, weight above shoulder height, heat beside something that burns, and an unsafe placement near a child's reach. If that checks out, start at Safety.
- Supplies aren't grouped by activity the way the four labeled bins are supposed to work, so finding one thing means opening several. Confirm in 30 seconds: Fetch it once and count the movements. More than two and the storage is charging you rent every time. If that checks out, start at Straighten.
- The bins have drifted out of their labeled categories over time, so what's inside no longer matches what the label promises. Confirm in 30 seconds: Ask where one specific item lives. If two people answer differently, or nobody answers, it has no home. If that checks out, start at Straighten.
A half-finished project has held the good end of the work surface for months, and clearing it feels like quitting
- It's a decision nobody's made about whether the project is actually still active, not a storage problem. Confirm in 30 seconds: Pick up one piece. If your first thought is a verb (pay, sign, call, decide) rather than a place, it needs a decision, not a home. If that checks out, start at Sort.
- It's been sitting on the table so long that it doesn't register as unfinished anymore, just part of the furniture. Confirm in 30 seconds: Ask someone who does not live here to name what looks out of place. If they see it instantly and you had stopped noticing, this is the cause. If that checks out, start at Sort.
- The project stalled because it never got a named next action and a day to do it, so it just sits. Confirm in 30 seconds: Name the moment it happens. If the answer is "when I get round to it", there is no trigger and it will not survive a bad week. If that checks out, start at Sustain.
The glue gun is still plugged in on the table after everyone's walked away, and the scissors are sitting blade up where a child reaches across the table
- A hot glue tip and blade-up scissors within a child's reach are safety constraints that outrank how the table looks. Confirm in 30 seconds: Look for the four: a blade your hand would meet, weight above shoulder height, heat beside something that burns, and an unsafe placement near a child's reach. If that checks out, start at Safety.
- There's no standard that scissors go back point down in the cup and the glue gun gets unplugged before anyone leaves the table. Confirm in 30 seconds: Ask two people in the house to describe this zone when it is finished. Two different answers means there is no standard to keep. If that checks out, start at Standardize.
- Nobody specifically checks the table for a hot tool before the room empties. Confirm in 30 seconds: Ask who resets this zone. If the honest answer is "whoever gets to it" or two names with no agreement, there is no owner. If that checks out, start at Sustain.
Only have 15 minutes? For any project sitting on the work surface, name its very next physical action and the day you will do it, out loud. If you can't produce both without stalling, the project is finished whether it says so or not. Break it down: good materials go back into the paper, drawing, or glue bins where the next project can use them, and the partly worked piece goes to someone who will finish it or goes out. Put the scissors point down in the cup and unplug the glue gun. Victory: The work surface is completely clear except for at most one active project bin, every scissors sits point down in its cup, and the glue gun is unplugged.
The six passes, in order
Work them in this order. Sorting after you have arranged things means arranging things you were about to remove.
This zone's full kit list is below, after the method. Skim it first if you would rather gather everything before you start.
Sort
Decide what stays. Everything else leaves the zone now.
Test every marker on a scrap of paper, because the cap tells you nothing and the scrap tells you everything. Throw the dried glue sticks, the paint that has separated and will not stir back together, and any kit whose instruction sheet is gone and cannot be found online.
What to store it in, now that you know what you are keeping
Bins and shelves are for what Sort left behind, not a stand-in for it. Buying storage before sorting means buying a container for things you have not yet decided to keep.
Only if it applies to the craft area: 7 more
Not every home needs these for the craft area. Each one is here because some do, and the reason is next to it.
- Pegboard Panel System Create visible tool and supply homes, in the Straighten, Standardize and Sustain passes. Do not overload; anchor wall-mounted or tall systems where required.
- Board Game Component Bags Keep game pieces complete, in the Straighten, Standardize and Sustain passes. Do not overload; anchor wall-mounted or tall systems where required.
- Portable Project Tray ×2 Contain one active project and its parts, in the Straighten, Standardize and Sustain passes. Do not overload; anchor wall-mounted or tall systems where required.
- Controller Dock Charge and contain game controllers, in the Straighten, Standardize and Sustain passes. Do not overload; anchor wall-mounted or tall systems where required.
- Remote Control Tray Create one visible home for controls, in the Straighten, Standardize and Sustain passes. Do not overload; anchor wall-mounted or tall systems where required.
- Toy Bin with Picture Label ×4 Support independent child cleanup, in the Straighten, Standardize and Sustain passes. Do not overload; anchor wall-mounted or tall systems where required.
- Front-Facing Book Bin ×2 Display children's books for easy access, in the Straighten, Standardize and Sustain passes. Do not overload; anchor wall-mounted or tall systems where required.
Straighten
Give what stays a home, placed where the hand actually reaches.
Pack the bins by what gets made, not by what the material is, so the drawing bin holds paper, pencils, and the sharpener together rather than sending a child to three shelves. One lidded bin lifts out and carries to the table in one hand, and goes back the same way.
Shine
Clean it, and use the cleaning to inspect what you cannot see when it is full.
Scrape dried glue and paint off the work surface with a plastic scraper before you wipe, get into the cracks where glitter sits, and stand the brushes bristle up so they dry without bending.
Surface by surface, all 7 of them, with what to use on each.
Safety
Make the zone safe for everybody who uses it, including the shortest person.
The glue gun is the real hazard here. It has no obvious off signal, its tip stays hot long after the last bead, and it gets left plugged in on a surface a child can reach. Give it a fixed cooling spot on a hard tile and unplug it before you clean up, not after. Keep the craft knife, the seed beads, and anything solvent based on a high shelf, not in a floor-level bin.
Standardize
Write down the best way you know today, so it survives you forgetting.
One project out at a time, and the label on the front of each lidded bin names what it makes rather than what it holds. That rule is what stops the work surface from filling.
Sustain
Attach the reset to something that already happens, so it keeps itself.
When the table is being set for dinner, the open project bin closes and goes back on the shelf, whatever state the project is in, by whoever opened it. One project out at a time is the whole standard, so two open bins is the slip and you can count it from the door. Recovery is closing one, seconds, and genuinely allowed even mid glue. The difficulty is emotional rather than practical. Packing up an unfinished thing feels like abandoning it, which is why the rule hangs on dinner, which nobody argues with.
The kit this zone called for
Everything above assumed you had these already. Types of thing, not brands: anything you already own that does the job is the right one to use.
- Color-coded microfiber cloth set ×12 Shine Wash by use color; avoid fabric softener.
- Neutral pH multi-surface cleaner Shine, Sustain Verify surface compatibility; lock around children and pets.
- Compact vacuum with attachments Shine Use appropriate attachment.
- Keep, Relocate, Donate, Recycle, Trash container set ×5 Sort Do not block exits.
- Portable cleaning caddy Straighten, Shine, Sustain Secure chemicals from children and pets.
- Portable label maker Standardize, Sustain Follow surface and adhesive guidance.
- Removable write-on labels Standardize Test on delicate finishes.
Only if it applies to the craft area: 1 more
- Shelf Location Label Set Standardize, Sustain Install and use according to product instructions.
The half-finished project
There is a bag or a box here holding something started with real enthusiasm and abandoned somewhere in the middle, and it has held the good end of the work surface for months. The problem is that clearing it feels like quitting, so it stays and nothing else gets started. Use this test, out loud, project by project. Name the very next physical action and name the day you will do it. Not the goal, the action. Cut the second sleeve. Buy the size four needles. If you cannot produce both halves without stalling, the project is finished, and it finished a while ago without telling you. Break it down. The good materials go back into the paper, drawing, and glue bins where the next project can use them. The partly worked piece goes to somebody who will finish it, or it goes out. And you get back the one thing this zone is actually short of, which is a clear surface for the project that has enthusiasm behind it right now.
Cleaning it properly, surface by surface
Dried glue and glitter defeat a wet cloth, so scrape and lift the dry mess first, then wipe. Work from the surface down into the seams and finish on the floor.
Work down, not across. Whatever comes off a high surface lands on the one below it, so cleaning the floor first means cleaning it twice.
Carry these in with you. Compact vacuum with attachments; Neutral pH multi-surface cleaner; Color-coded microfiber cloth set; Portable cleaning caddy; Plastic scraper (not in this zone's list, needed to lift dried glue and paint); Soft detail brush (not in this zone's list, needed for glitter in seams).
- The work surface top
Scrape dried glue and paint off with a plastic scraper first, then wipe the whole surface with neutral pH cleaner and dry it, so the next project starts on clean wood. - The cracks and seams in the work surface
Vacuum or brush the glitter and dried flecks out of the seams and joins where a cloth just skates over them, using a soft detail brush to lift what is wedged in. - The bin lids and labels: paper and card, drawing, glue and tape, kits in progress
Wipe each lid and its label with a barely damp cloth, then dry, so the labels stay readable and the lids seal flat. - The bin interiors
Tip out and wipe the inside of each bin, since crumbs of dried glue, loose beads, and pen lids collect in the corners. - The brushes and the scissor cup
Wash the brushes clean and stand them bristle up to dry without bending, and wipe out the cup that holds the scissors point down. - The glue gun cooling spot on its hard tile
Once the gun is unplugged and cold, peel the dried glue strings off the tile and wipe it, so its fixed spot stays clear for next time. - The floor under and around the table
Vacuum the floor thoroughly, working the corners, because beads, glitter, and paper scraps travel further here than anywhere else in the room.
How to clean anything else in the house, surface by surface.
Inspect as you clean. Cleaning is the only time you see the zone empty, so use it.
- A scorch mark or a melted ring on the surface where the glue gun sits and cools.
- A glue gun cord with a cracked or heat-stiffened sheath near the tip end.
- A leaking glue or marker bottle staining the base of a bin, or a solvent smell where a cap has failed.
- A scissor or tool cup that tips easily, ready to spill points onto the shared floor.
- Seed beads, googly eyes, or pompoms that have escaped onto the floor a crawling child uses, all choke sized.
The standard that keeps it fixed
Four lidded bins labeled by what they make, one project bin out on a clear surface, the glue gun unplugged on its tile, and knives, beads, and solvents above the youngest child's reach.
Reset trigger. When the table is being set for dinner.
How much the craft area can actually hold
Four lidded labeled bins grouped by activity, scissors standing point down out of the youngest child's reach, one clear work surface, and exactly one project bin out on it at a time.
If four bins will not hold the supplies, you are storing materials for projects nobody is doing. Keep the activities that actually happened this season, because a fifth bin is almost always an abandoned one. Run the honest count.
When this does not describe your craft area
The passes above describe the ordinary case. Plenty of real households are not ordinary, and the fix is not to skip the method, it is to run it against a different starting shape.
- An adult hobby rather than children's crafts
- The bins stay and the reach rule relaxes, but the one-project-out rule matters more. An adult project left out is what turns a shared family surface into a workshop nobody else can use.
- No dedicated surface, so the dining table is the work surface
- The lift-out bin becomes the whole system and the trigger is the meal rather than the end of the project. Everything returns to one bin that leaves the table, which means the bin, not the table, decides how big a project can be.
The rest of the family room
Each of these is one session on its own.
- The Primary Media Zone
- The Toy and Play Zone
- The Board Game and Puzzle Zone
- The Blanket and Comfort Zone
- The Charging and Device Zone
- The Craft and Activity Zone, you are here
The Family Room in full, with what each of the 6 zones is for
The family room as a deck of 69 cards: the frictions people report in each zone, the root cause behind each one, and the timed action that clears it. Free to read or print.
Related reading
- This zone's safety pass, in full
- Moving three things to get to the one you need?
- Is mail piling up on this exact surface?
- Why the standard above names one home per category
- Why this zone gets messy again
Questions people ask about this zone
- How long does it take to reset the craft area?
- One session: 45-75 min, most of it in Sort, testing every marker and opening every kit.
- What does a finished craft area look like?
- Four lidded, labeled bins (paper and card, drawing, glue and tape, kits in progress), scissors standing point down in a cup out of the youngest child's reach, one completely clear work surface, and exactly one project bin out on it.
- What is the hardest call to make in the craft area?
- There is a bag or a box here holding something started with real enthusiasm and abandoned somewhere in the middle, and it has held the good end of the work surface for months. The problem is that clearing it feels like quitting, so it stays and nothing else gets started. Use this test, out loud, project by project. Name the very next physical action and name the day you will do it. Not the goal, the action. Cut the second sleeve. Buy the size four needles. If you cannot produce both halves without stalling, the project is finished, and it finished a while ago without telling you. Break it down. The good materials go back into the paper, drawing, and glue bins where the next project can use them. The partly worked piece goes to somebody who will finish it, or it goes out. And you get back the one thing this zone is actually short of, which is a clear surface for the project that has enthusiasm behind it right now.
- How do you keep the craft area from getting cluttered again?
- Four lidded bins labeled by what they make, one project bin out on a clear surface, the glue gun unplugged on its tile, and knives, beads, and solvents above the youngest child's reach. When the table is being set for dinner.
- What do you need to clean the craft area?
- Compact vacuum with attachments; Neutral pH multi-surface cleaner; Color-coded microfiber cloth set; Portable cleaning caddy; Plastic scraper (not in this zone's list, needed to lift dried glue and paint); Soft detail brush (not in this zone's list, needed for glitter in seams).
- What do you clean first in the craft area?
- The work surface top. Scrape dried glue and paint off with a plastic scraper first, then wipe the whole surface with neutral pH cleaner and dry it, so the next project starts on clean wood.
- Is there a burn or fire risk in the craft area?
- A glue gun left plugged in on the table after everyone walks away. The tip holds enough heat to burn a hand or scorch the surface long after the last bead of glue.
- Is there a fall, cut, or crush risk in the craft area?
- Craft knives and sharp-point scissors stored blade up in a cup, or left flat on a work surface a child reaches across from the other side.
- Is there a poison, choke, or strangle risk in the craft area?
- Seed beads, googly eyes, and pompoms live in the same open room as a crawling child, and craft glue and solvent based markers belong on a high shelf rather than in a floor-level bin.
- Why does the craft area do this: Seed beads and pompoms from the kits-in-progress bin are scattered on the floor this room shares with a crawling child, and finding the glue means opening three different bins?
- Small beads on a floor a crawling child also uses are a choke hazard that overrides anything about the room's tidiness, so start at Safety; Supplies aren't grouped by activity the way the four labeled bins are supposed to work, so finding one thing means opening several, so start at Straighten; The bins have drifted out of their labeled categories over time, so what's inside no longer matches what the label promises, so start at Straighten.
- Why does the craft area do this: A half-finished project has held the good end of the work surface for months, and clearing it feels like quitting?
- It's a decision nobody's made about whether the project is actually still active, not a storage problem, so start at Sort; It's been sitting on the table so long that it doesn't register as unfinished anymore, just part of the furniture, so start at Sort; The project stalled because it never got a named next action and a day to do it, so it just sits, so start at Sustain.
- Why does the craft area do this: The glue gun is still plugged in on the table after everyone's walked away, and the scissors are sitting blade up where a child reaches across the table?
- A hot glue tip and blade-up scissors within a child's reach are safety constraints that outrank how the table looks, so start at Safety; There's no standard that scissors go back point down in the cup and the glue gun gets unplugged before anyone leaves the table, so start at Standardize; Nobody specifically checks the table for a hot tool before the room empties, so start at Sustain.
When you want it off the screen
Carry The Craft and Activity Zone into the room
The method above is complete and free. The Whole House Print Pack puts The Craft and Activity Zone and the other 113 micro zones on 684 printable cards, so the steps you just read are not stuck behind a phone screen while your hands are full.
The Print Pack, 19 dollarsJust this zone, 4 dollarsOr draw a card free
The Craft and Activity Zone on its own is 4 dollars for 6 cards. All 114 micro zones is 19 dollars for 684. The whole house is the better buy; the single zone is here so you can take only what you are working on.
If The Craft and Activity Zone keeps fighting back, the real problem usually sits somewhere else in the room. A one hour virtual consult is 250 dollars: we find the function, the friction and the root cause together, and you keep a written standard for the space.
See what a consult covers, 250 dollars
Not ready to pay for that either? Ask which zone first, free